My Crafty Wish List!

Every year around Christmas time, my husband always says, “ugh you are so hard to buy for!”.  Um, really dude?!  Come on!  I have some of the best hobbies in the world, making it super easy to find awesome gifts for me, right?! Ha, well.  Not quite according to him.  According to him, I HAVE EVERYTHING!  Whining commences.   He actually is the hard one to buy for,  so there.

So, I started to look at various places for ideas of things that I had been drooling over since last year.  Then I realized that I am hard to buy for!  I am blessed to be able to purchase those awesome tools and supplies that when I see them I must have them! It’s all so FLUFFY!! There would be no way I could wait all year-long until Christmas to get some of the awesome goodies that come out throughout the year.  One of the things that I love to do throughout the year, is add items that I think I may want or use to my Amazon Cart, then save them for later.  Most of the time. Ha.  If I really really want it and will use it soon, I’ll get it.  But, most of it ends up on my wish list.  I read a lot of blogs, see lots of great products here and there.  It’s a great way to save those ideas as I go, do my own research later, and decide if I need it.

I have to admit, I did stick to my resolution last year, and dramatically cut down on my fabric & crafting purchasing.  I have a 13×11 room all to my self for my craft, with a walk in closet.  Yet, I still have some bins of fabric stored away in one of my spare rooms. I really tried to stay away from my fav online fabric stores (sorry guys, I know you must have taken a hit!).  Also, any time that I went to a fabric or craft store for something that I actually needed for a project, I rarely took a cart.  I tried to stick to a carry basket to prevent it from overflowing with new to sale $1.49/yard flannel bolts…

I am glad that I stuck to this, as I have enough fabric to get me through at least a year of the Zombie Apocalypse.   Plus, since we’ve decided to start trying for bambino #2, I really, really don’t have a back up hiding space, I mean storage in the spare bedroom.  And, I really am not supposed to be getting any Christmas presents this year.  (shhh don’t tell hubby!)  I truly am a Jedi, I always know how to Jedi mind trick him.  I purchased my every so lovely Bernina 750 QE this year.  It was my Birthma-mothers-christmas-versary present, so that was a BIG splurge.  I wanted to keep it simple and easy this year.  Nothing crazy.  For once!  Here is my list for Santa!

1.  Additional feet for my Bernina.  On my list:  Applique’ foot #23: I do a lot of applique, I love it.  It’s super easy and gives a great effect to my projects.  I really could have used this for on a recent custom Mini Monsters Quilt, making it way easier to manuever around all those corners!

Mini Monsters baby Quilt, Custom order

Invisible zipper foot #35:  I actually love zipper installs.  Invisible’s can be a tad trickier.  This foot would help!

Zig Zag Hemmer foot #63:  I don’t have one, and I have been making more and more apparel since I have a little pumkin to dress now!

Non Stick Zig Zag Foot #52D: Here is one that I know would help out when sewing oil cloth & other sticky materials.  Oh the possibilities!

I truly believe that when we have more options with your machine, not only can you create more, your projects are easier and faster!  Sometimes even less intimidating.  I have always wanted to sew more vinyl, oil cloth, and even leather, to make some cute little pouches or bags.  It would make life a lot easier to have a smooth gliding foot.  I do have quite a good collection of feet. The 750 came with a great assortment.  My little Barbie box is full!

Shortly after purchasing my 750, I stumbled upon a great deal on a Bernina Artista 180.  It came with all of the embroidery attachments, a snazzy VHS tape with instructions, lots of additional feet & goodies!  I love that this older machines feet will feet my Big Bernie.  Little Bernie, meet Big Bernie!  So cute.

Bernina Artista 180

Cheap, I mean, I had to!  Main reason, it does embroidery.  The 750 QE can do embroidery, but for about $2000 extra.  Ouch.  I didn’t embroider all that much with my other machine that had it, but for a steal on a Bernina 180, I took it.  Plus, I plan on this being my daughters first machine when she’s old enough to start sewing.  It included several feet that I didn’t have, which was a bonus!  They are great stocking stuffer’s, because they are so tiny and lovely!

2.  Mini iron & portable pressing station.  So, right now, as mentioned before, I have a spare room that I house all of the big items & extra bulky fabrics.  Well, we are going to need that room this year, moving Little Miss C over to her big girl room.  I currently have a large, steaming Rowenta iron and oversized ironing board in there, as well as a large fold out cutting table.  Well, this is gonna have to go, so I would love to have a portable ironing/cutting station that I can keep and store inside my Craftorium.  I found this made by Omnigrid.  I could lay it out on the floor, or search for counter space somewhere!  It won’t replace larger pressing or cutting jobs, but I think that it would be great for piecing.  Think that I will also search the web and make a converted TV table ironing board for my room.  Unless I can Jedi mind trick hubby again to make one for me!

3.  Q Snap Frame: I have been doing embroidery for a long time, however cross stitching recently came back into my life.  I have traditionally used hoops, but this frame looks amazing! Seems a lot easier to load your fabric.  Plus it comes in several different sizes!

4.  Tucker Trimmer:  There are a few sizes of this über cool tool.  I have to admit, I discovered this one while watching Fons & Porter’s For the Love of Sewing Show.  Yes, nerd. But I love it!  The Tucker Trimmer is a ruler that helps you square up your pieced blocks and keeps them all nice and even.  It will allow you to trim down a squared block to the perfect size.  It has diagonal, corner to corner markings to get that perfect size.  I do lots of half square triangle quilts, love them!  There are so many possibilities.  However, you have to be really careful about squaring them up, and your seam sizes.  They all must be perfect to match up at the end.  I can see this little ruler being a well used tool in my sewing!

5.   318 Patchwork Patterns Book:  This book hasn’t been released yet, so I guess Santa can’t bring it for me, but I still want it!  Can Santa pre-order?!  I have been seeing it around on Instagram and lots of ladies are talking about it.  Designer Kumiko Fujita has designed some amazing things, 318 things!

6.  Rotating Cutting Mat:  I mean, cool right?!  Would be wonderful for cutting piecing pieces.  These cutting mats are on top of a rotating platform, making it easy to turn your mat, instead of repositioning your fabric each time you need to make a new cut.

7.  Non Stick Pressing Sheet: Like I had previously mentioned, I do a fair amount of applique’.  I’ve heard great things about pressing sheets, and I can’t tell you how many times I’ve gotten gooey crap on my Iron.

8.  Olisio Iron:  Ok, I know I said there was nothing super crazy or expensive, but I guess this is.  I have large steam Rowenta Iron.  Love it.  But, I need something that is a smaller and easier to work with inside my Craftorium.  I have been seeing the Olisio on some of the sewing shows, and I really think its super cool!  Weird that you can just leave the iron flat like that, but I think the new technology is fantastic.

9.  Quilter’s Gloves:  I honestly can’t believe I don’t have any, but I just never have gotten around to getting some!  At first, when first starting out free motion quilting, I didn’t think that they were a necessity.  But, on my big Bernie, although I have lots of room to quilt and move, I am doing larger scale quilts.  I do often times find myself loosing grip or getting sweaty little sausage fingers.  I don’t want to mess up all that hard work!

10. Pilot Fixion Pens: LOVE these!  Years ago I saw them somewhere online being used for quilting.  They are erasable pens that when ironed, the ink disappears!  I always hated the blue pens and pencils, these make great, solid markings you can see, and go away with the heat of the iron.  I have never had any issues with residue etc with these.

11.  Quilter’s Bee’s Wax & Thread Conditioner:  Never used either product, but I have heard many great things!  It helps eliminate knotting while hand stitching.

12.  Numbered Quilting Pins:  These would be awesome for row piecing.  I typically use some good ole’ small post-it notes, but they don’t stay on all that well.

We will see what Santa brings me!  I can’t wait for the potential to get my hands on  some new goodies!  And if I do, I will do reviews on them and make sure I give you all some follow-up.

Merry Christmas & Happy Holidays everyone!

**This is my personal blog, I do not receive monetary compensation for any product reviews or recommendations.  All reviews represent the opinion of Sew.Bake.Love based on my personal use and results.  My opinions on products will not change it I received it at a discount or for free.  If an item was given for free or a discount I will disclose that on the individual blog posting at that time.
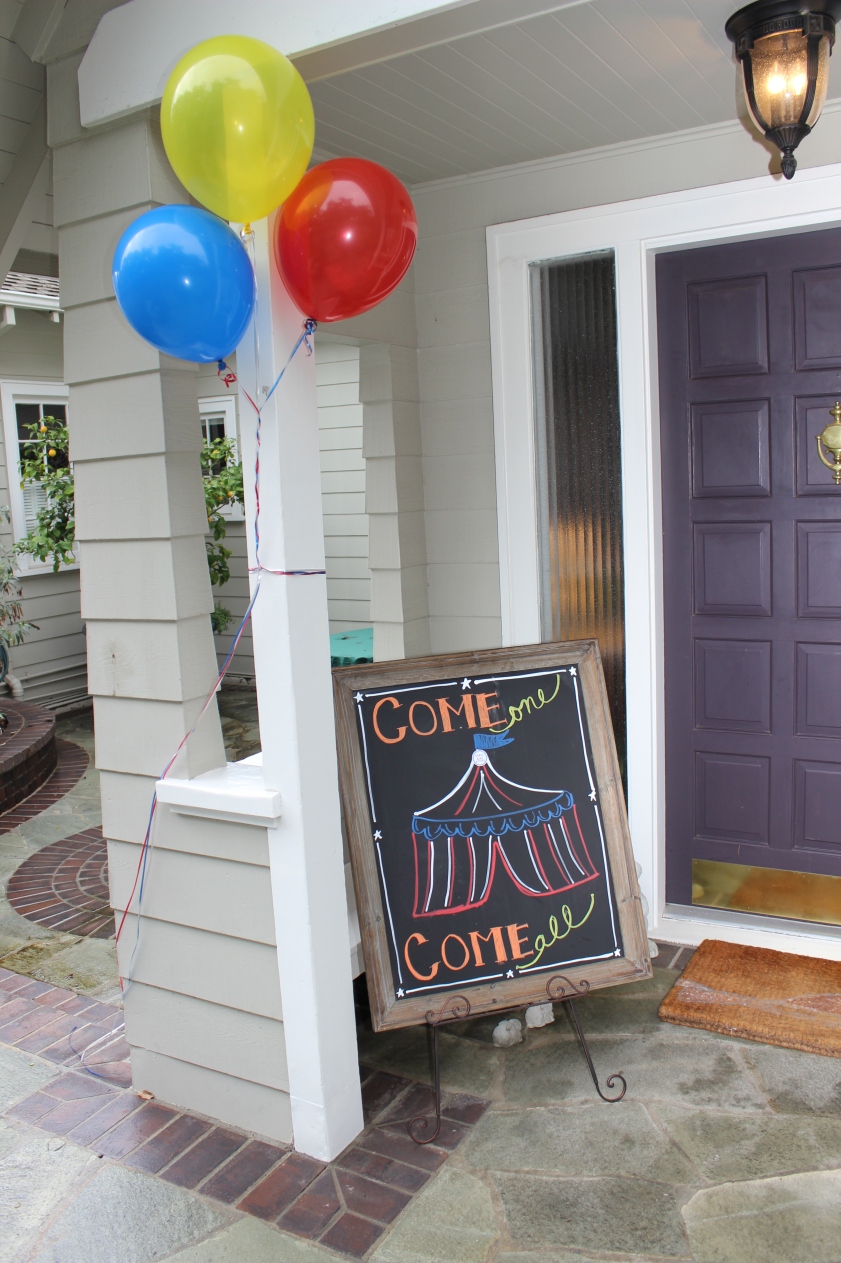
Circus Shower for Baby Sax

This was such a fun event to plan!  It was set in a beautiful home, and we had beautiful guests!

I ordered the invites from Tiny Prints, which started things off right!  I searched Etsy, found a wonderful shop LeeLaaLoo, which does amazing digital files for any party need you have!  She was a pleasure to work with and I got my files quickly!  There were so many things in there!  Flags, banners, games, signs, photo props and more!  I got some generic printables and some customized ones.  I started printing!
I think that my biggest challenge when throwing an event like this is to control myself and to not go overboard.   Really.  I do.  Most of the time.  But hey it always turns out amazing!  Drive my husband nuts, but he knows me by now and how I get way involved!
 

I stuck with bright, bold colors.  I love my chalk board collection and chalk ink markers.  I use them for everything!  I have to admit I draw like a little kid, but I think that it turned out pretty cute!

IMG_8036


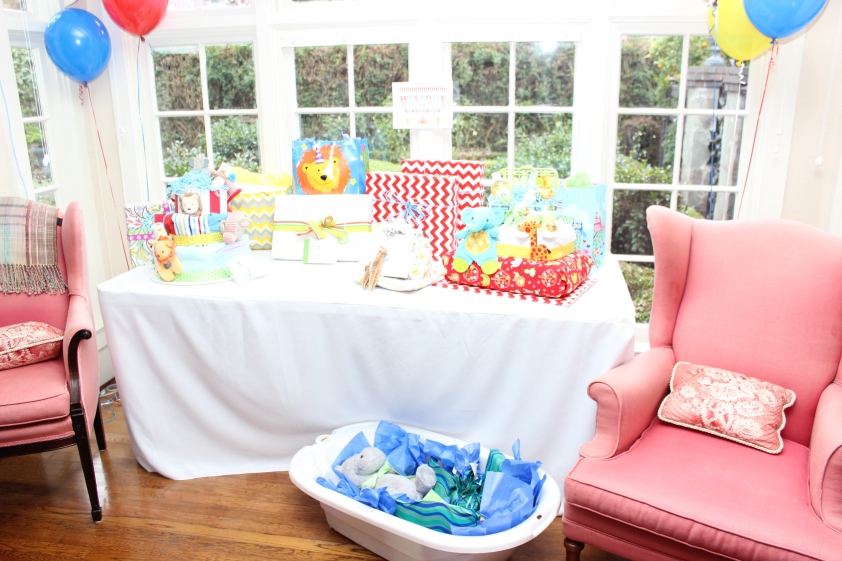
As the guests arrived they immediately would see the gift table.  I really wanted to make sure this just wasn’t some boring little table that all those little pretty packages would get plopped on.   The printable pack had a customized banner that we hung above the table.  We added a few fun balloons and I made some diaper cakes.  Who doesn’t love diaper cakes?!  I had some hidden intentions with these.  I love how they look.  Love.  Fun, bright, and packed full of goodies!  I used a pack of diapers for the bases, made some double-sided receiving blankets, and packed it with as many goodies as I could.  CJ’s Butter, Burt’s Bee’s, some Aden & Anais goodies and more.  Mama loved them, guests were impressed, my job is done!


IMG_8020

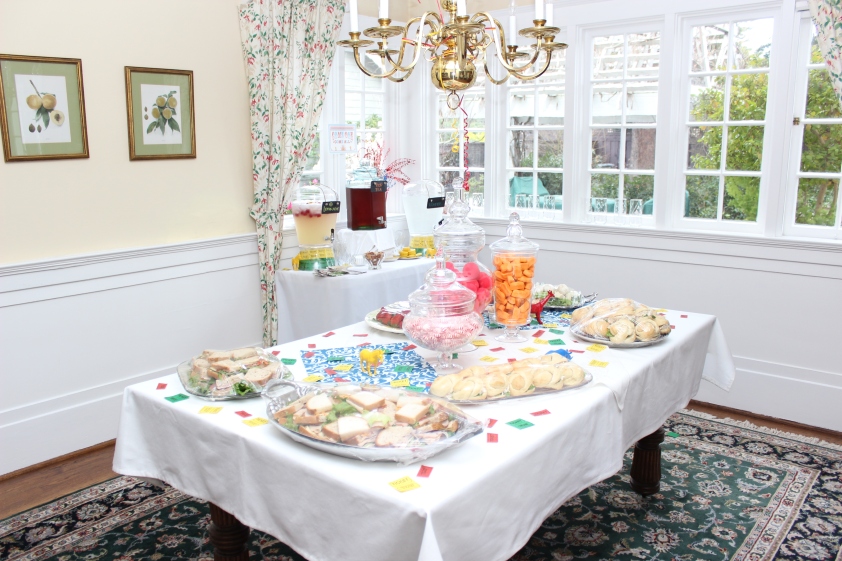
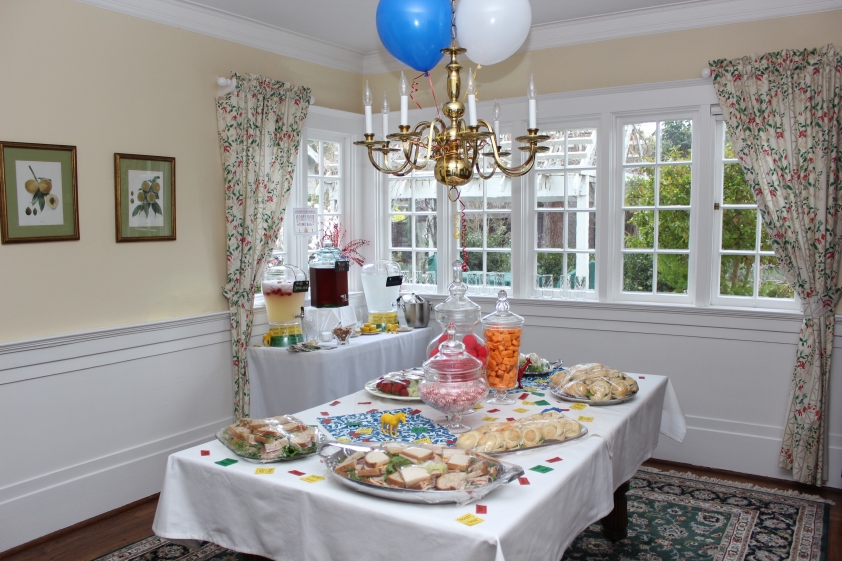
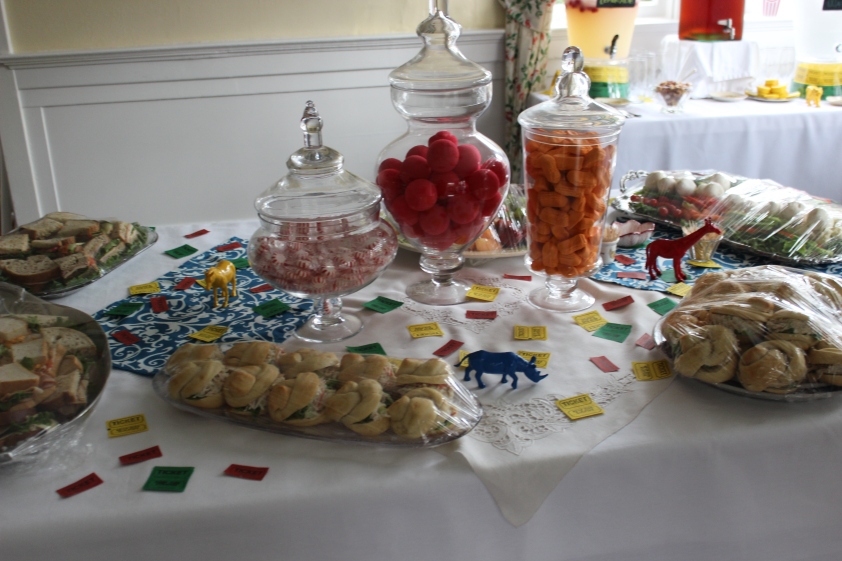
Isn’t this room amazing!  The room was full of light even though it was a rainy day.  I filled apothecary jars full of orange marshmallow peanuts, clown noses and red and white striped candies.  We used cheap raffle tickets from the dollar store as confetti giving the tables an additional pop.


IMG_7964


IMG_7959


IMG_7956

We raided the dollar store weeks before this shower, and we were lucky enough to find small plastic animals, rhinos, giraffe’s, lion’s, and tigers.  I have a wonderful, yet brave father in law who took on the task of spraying all of those little critters for me in a high gloss paint.  I couldn’t have been happier with how they turned out.

IMG_7965IMG_7971


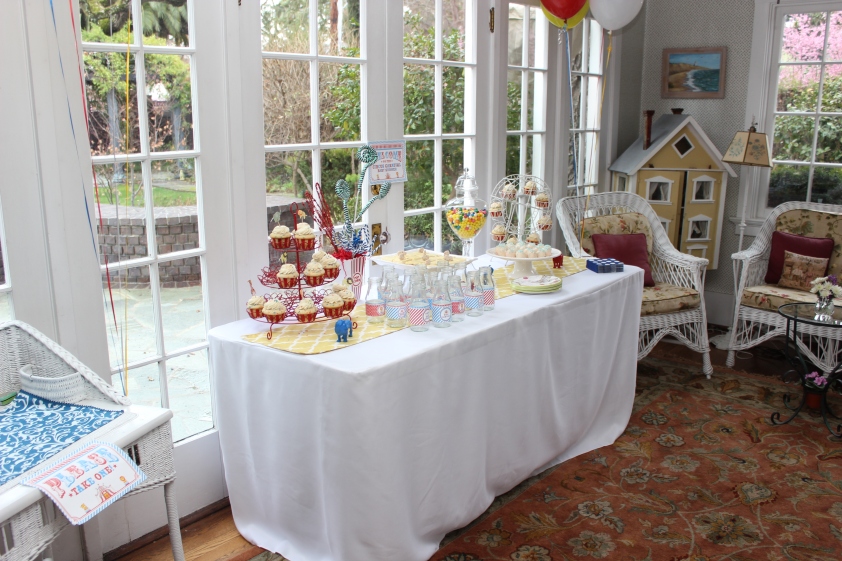
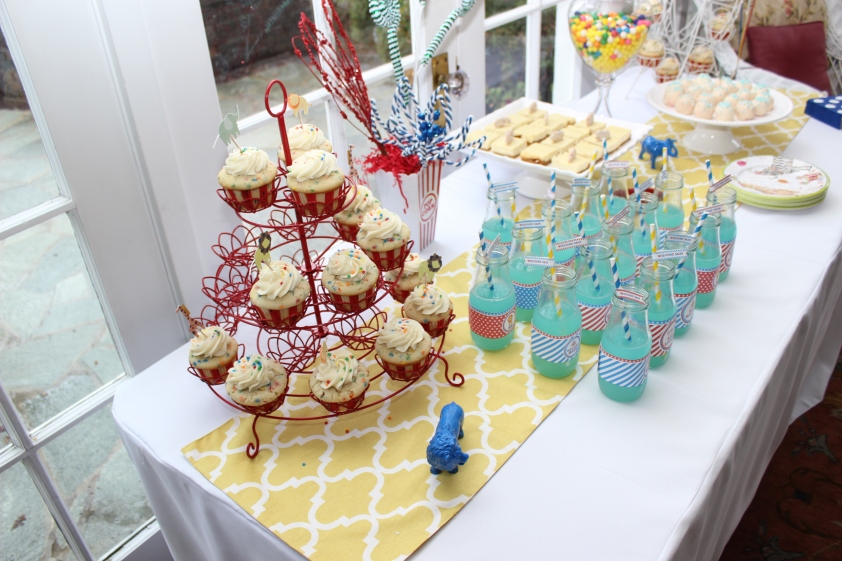
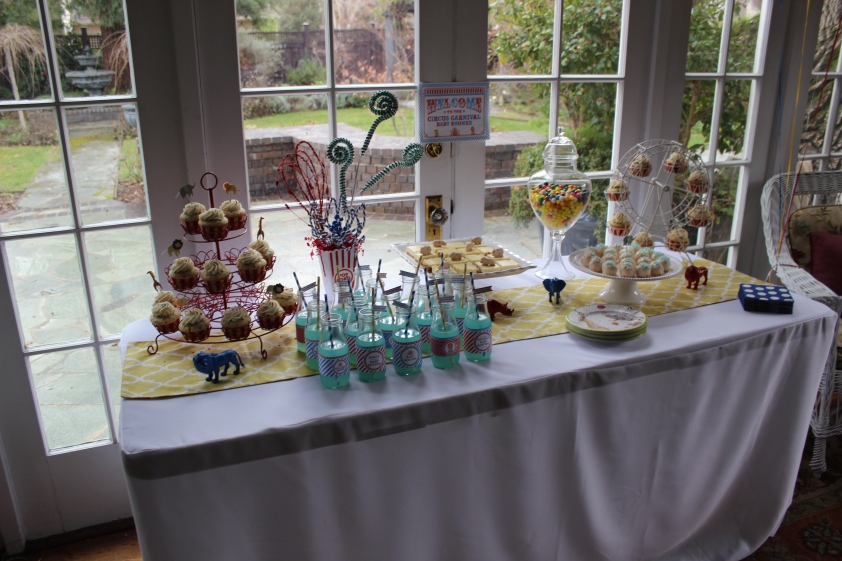
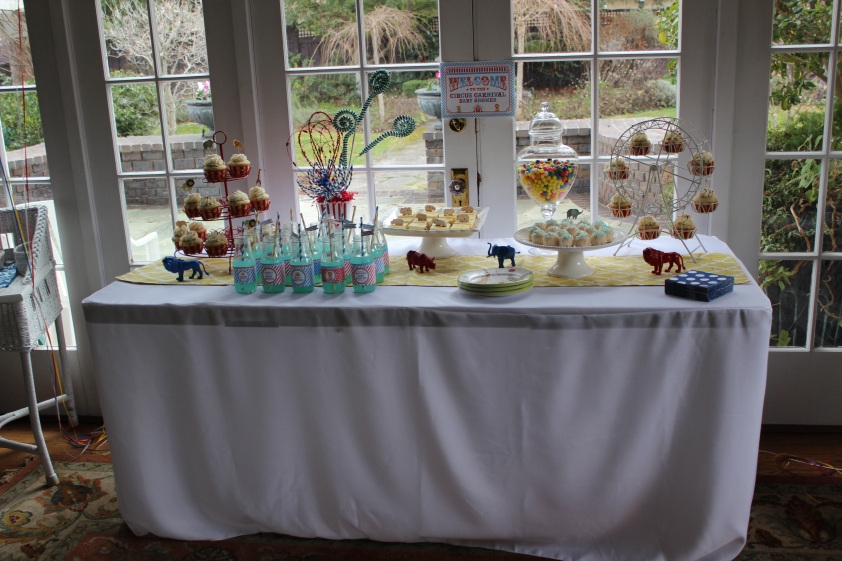
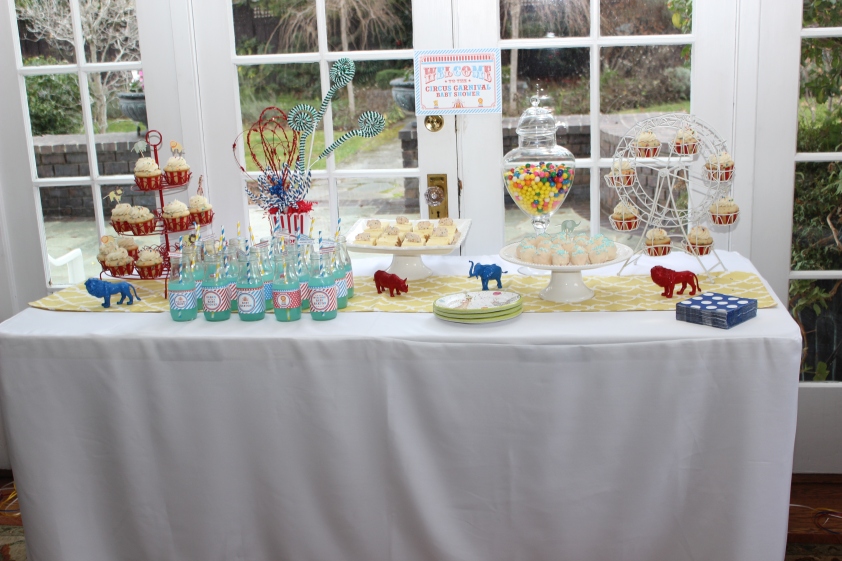
This was my baby.  The first thing that I thought about when I was asked to do this shower was the dessert table.   I had so many ideas!  It was hard to pick and STICK with them!  I couldn’t be happier with the response that I had from this!


IMG_7960

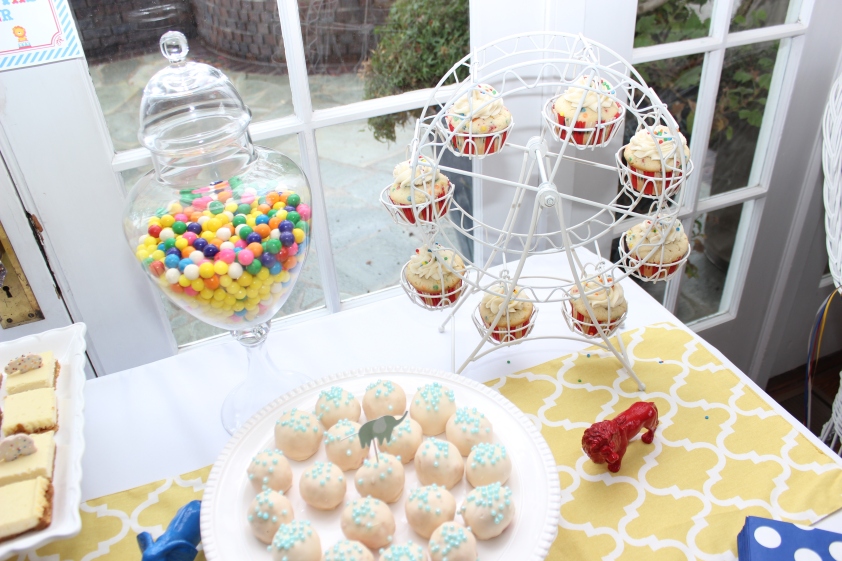
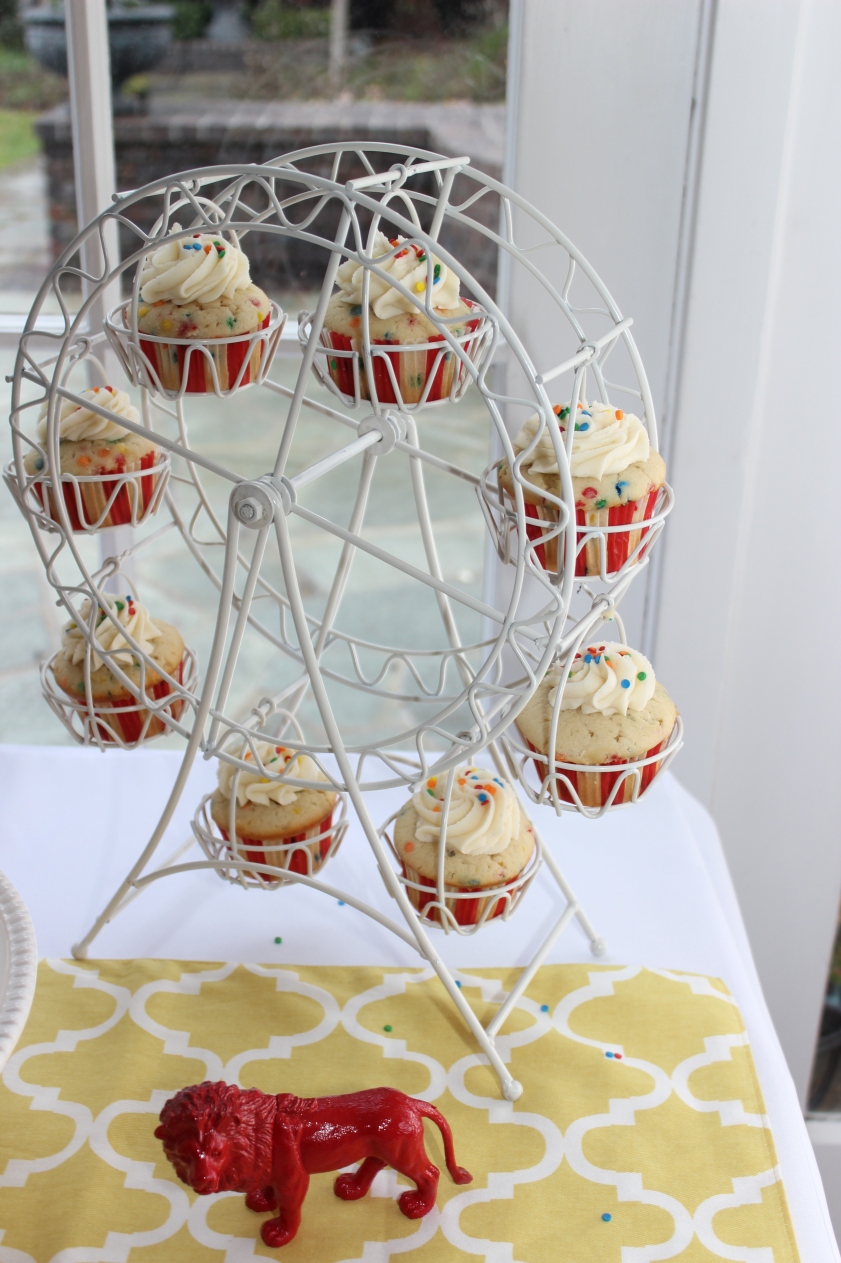
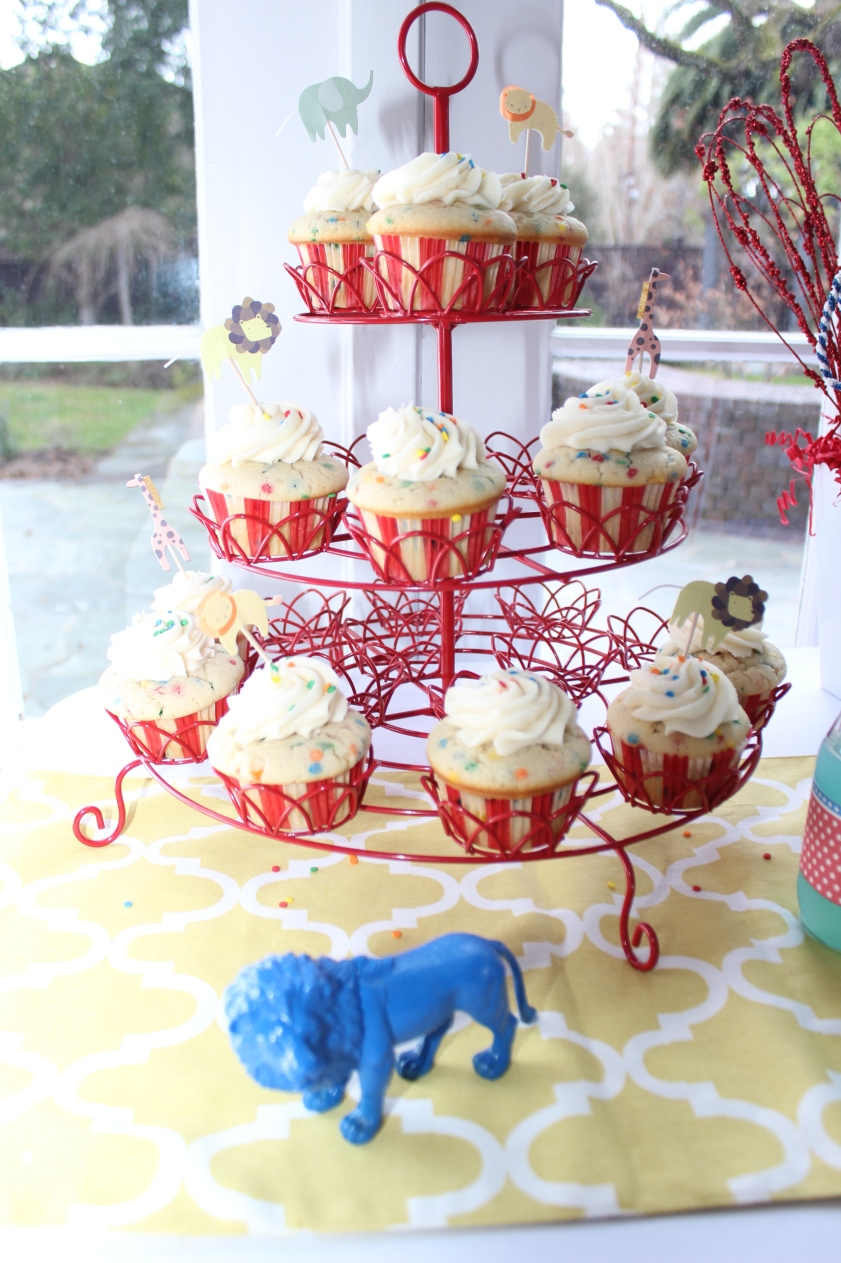
I bought that darling white cupcake ferris wheel on amazon.  It was a little tough to get the cupcakes in and out, but who cares its cute!  Gum balls were used as a jar filler, and the table runner was a steal at Home Goods.

IMG_8017

Funfetti cupcakes, from scratch, no box mixes here.  Yummm-o.

IMG_8013

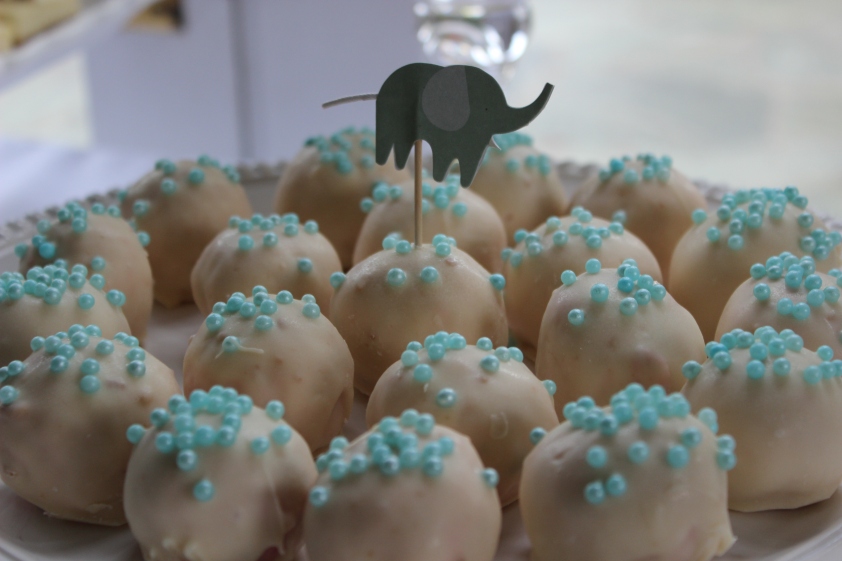
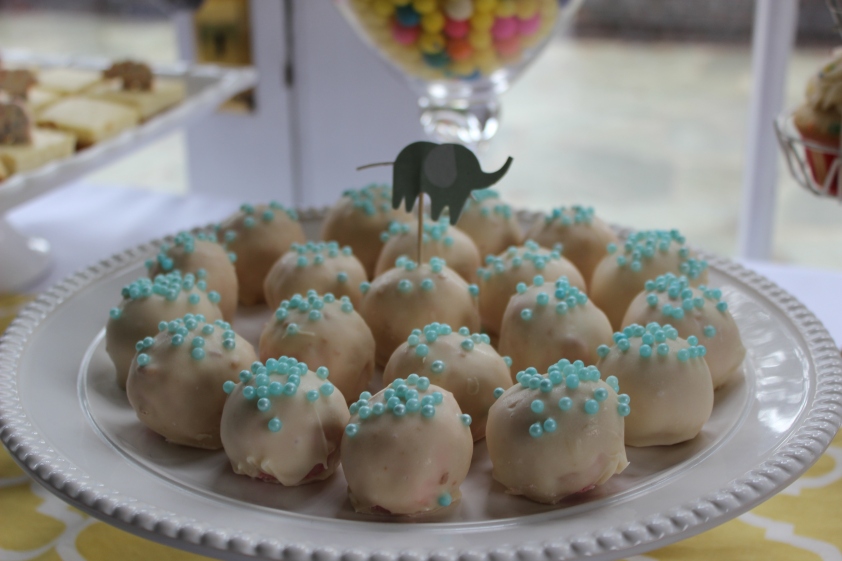
I also made animal cookie cake truffles.  They were so pretty and tasted so good!

IMG_8009 IMG_8008

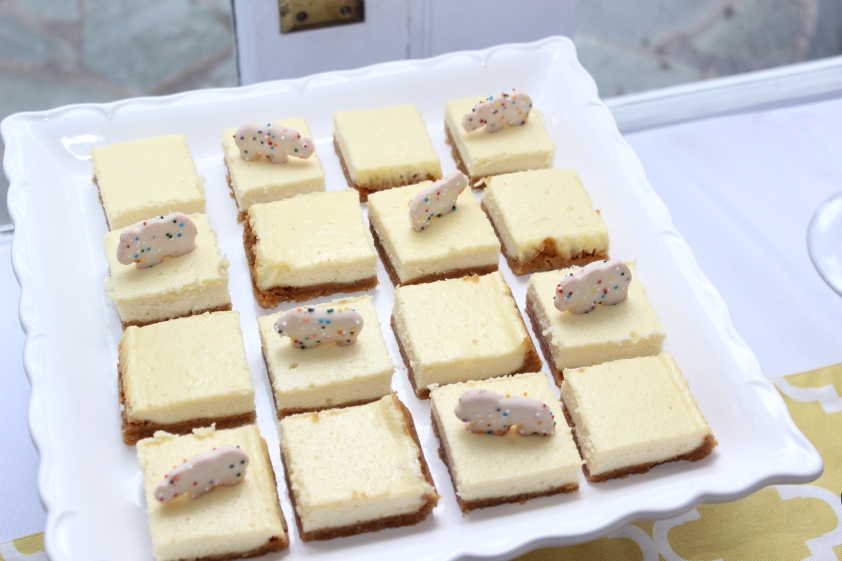
We had a few extra animal cookies, used them as topper’s on Aunt Deb’s famous cheesecake bars.

IMG_7997

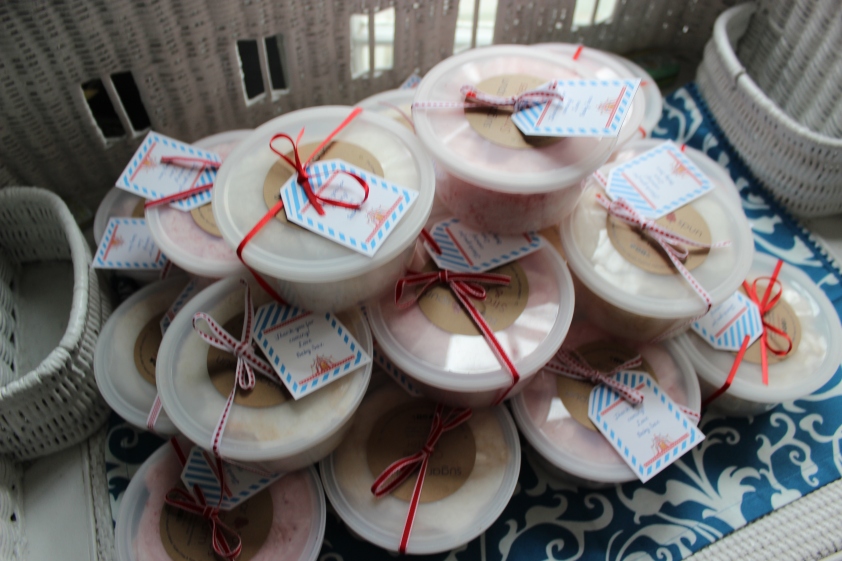
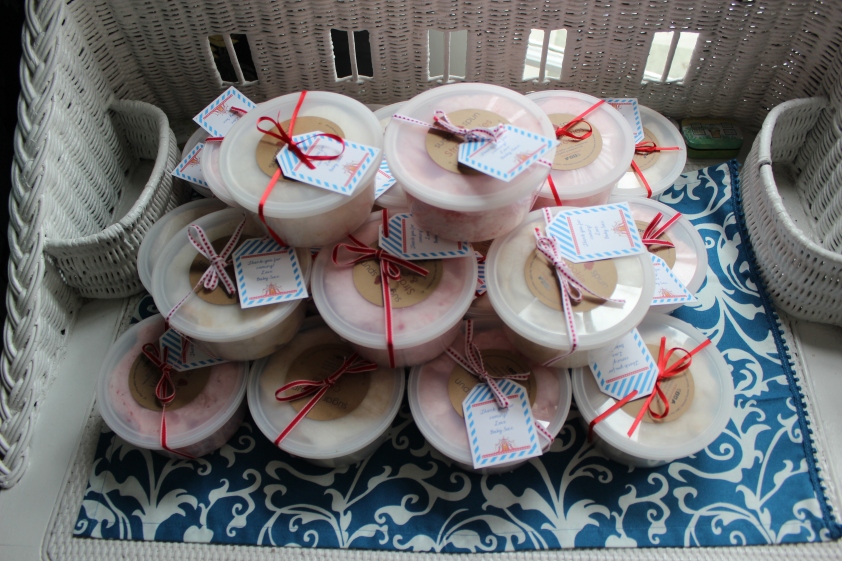
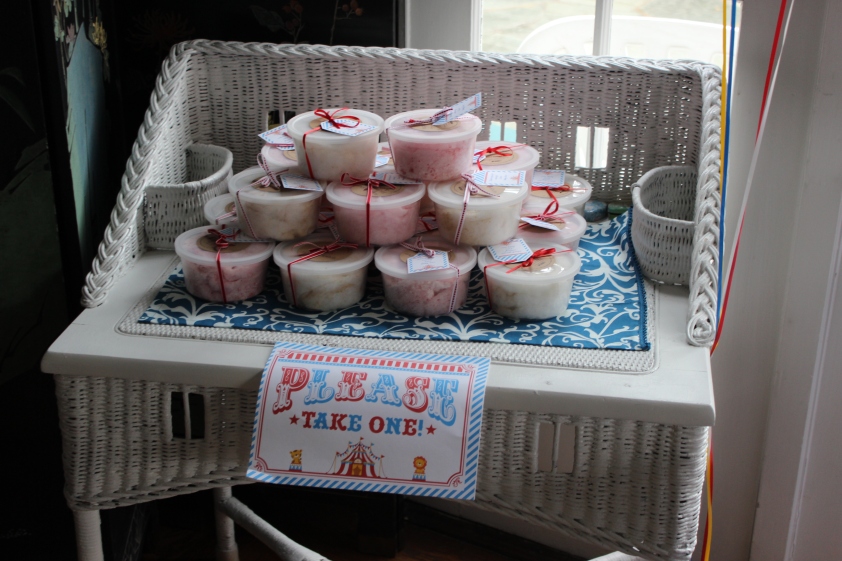
I really wanted to have a fun favor to give to our guests.  Not some cheesy little baby rattles or something that you throw in your junk drawer the second you get home.  Edibles are always a safe route.  Cotton Candy is one of those treats that you can usually only get at a circus or fair.  I didn’t think that it would be a possibility to have some fluffy sugar at the party, but I am blessed to live in the SF Bay Area, and I found a few places!  We decided on Sugar and Spun in San Francisco.    They came in those little tubs too.  Made it really easy!  The tags were also from the printable pack, tied off with some simple ribbons.  And I am sure that you are curious….Cookies & Cream and Strawberries & Cream where our flavors!  It was so yummy!

IMG_7991 IMG_7989 IMG_7987

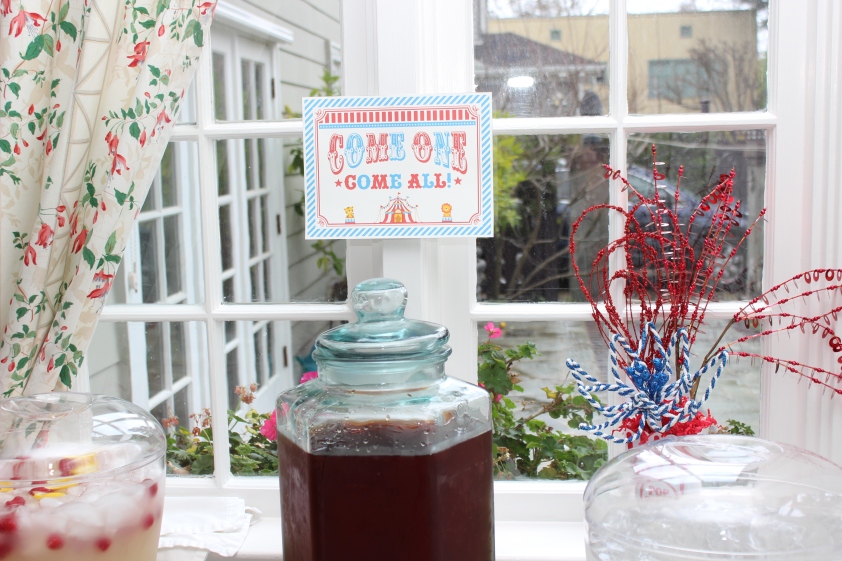
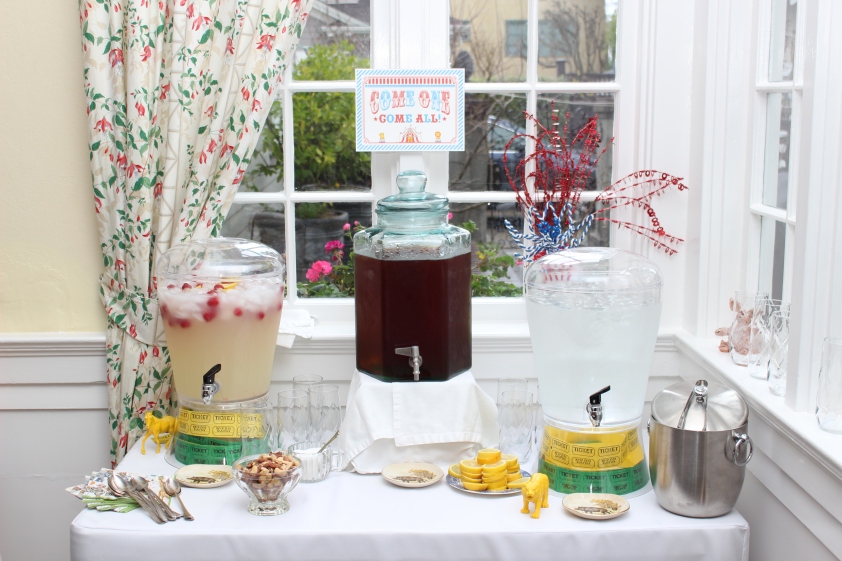
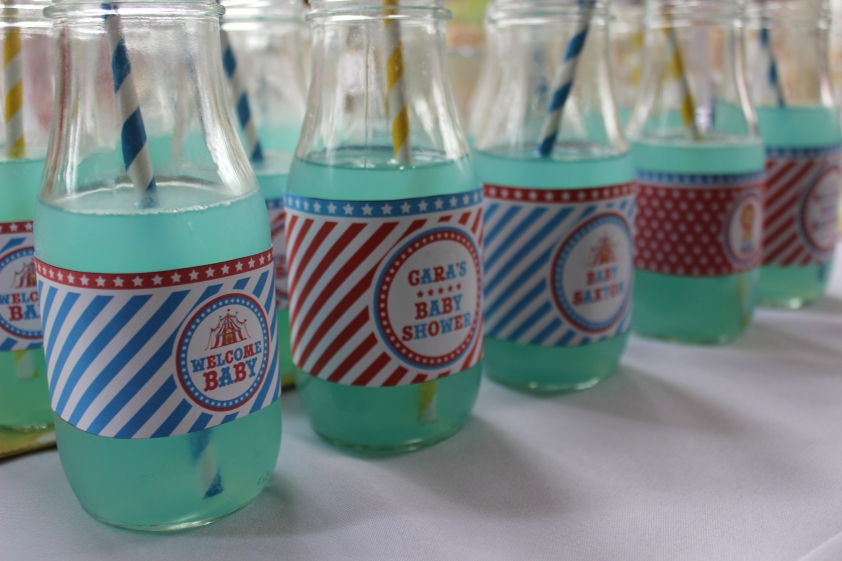
In the weeks leading to the shower, I started drinking and giving away the Starbucks bottled drinks.  Saved those bottles and began taking off all of the stickies.  The printable pack had general and customized labels.   I mixed them both and used blue and yellow paper straws, filling them with blue sparkling drinks.

IMG_7988 IMG_7985 IMG_7982 IMG_7978 IMG_7977 IMG_7973


This was a great shower!  The theme was classic and sweet for my little nephew!  I can’t wait to plan another one of these showers, it was a lot of fun!

Mod Elephant Quilt

Hey ya’ll!  It’s been awhile!  Been busy with Miss C and returning back to work!

I recently planned a wonderful shower for a wonderful mama to be!  My sister in law is expecting their first baby this March!  I am so excited to have nephew #2!  Of course, I offered to plan a shower, and those that know me I couldn’t just throw some cookies on a table and play some lame games!  I am working on a post for the shower, so come back soon to see it!

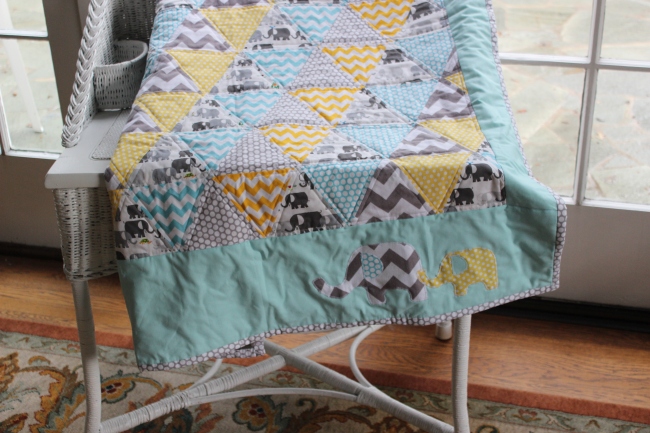
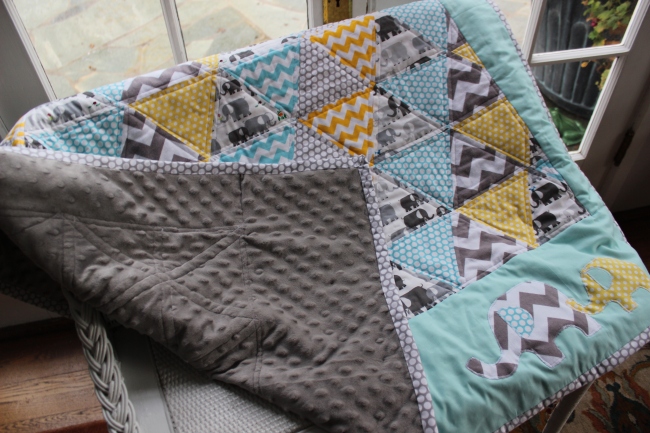
I cannot just buy gifts either!  There has to be some handmade ones!  Crafting, especially sewing skills are hard to find, and we all know how much those special handmade pretties are so desired!  I wrapped up a few of my favorites from my Von Sewin’ shop, burpies & a changing pad, perfect for a new mama, but I really wanted to make her something special for her little mister!  I decided to make a beautiful quilt for them, and this is what I came up with!

So being a busy mama, it gets tough some times to let my creativity flow out when I want it to.  I always seem to have great ideas when I don’t have the time!  I keep a journal with doodles and ideas in it, hoping and dreaming of the day when life will let me sneak in some creative time.  As my daughter gets older, I know that time will become more frequent.
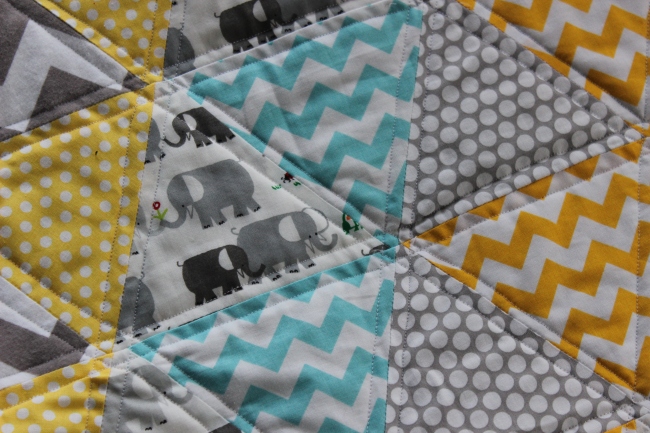
The first step in any quilt is the one that I love the most, shopping for fabric!  As I don’t have enough!  I knew that she was doing grays and yellow, and elephants.  I went to my go to shop, fabric.com and started searching.  I stumbled across a darling elephant print by Ed Emberley, Happy Drawings.  Adorable!  I had my focal fabric and went to work!  They have a work board where you can put all of your fabrics together and see how they look together!  Genius! I mixed it with several Riley Blake chevron and dots and minky for the backing.

Image

Image

Image

How cute is that!!

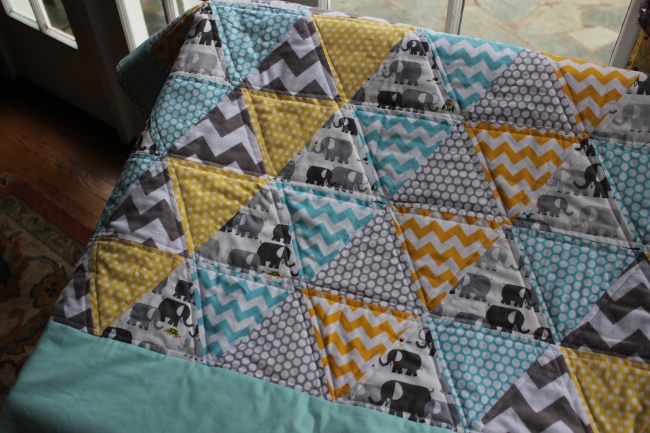
At first, I figured that doing something quick and easy would be best, like strips or squares.  Easy to cut, and fast to assemble.  As I started to cut, I froze!  I couldn’t decide between squares or rectangles.  Then the fact that I would have to do lots of quilting math just irked me!  I took a deep breath, and sat with my collection of fabrics I had chosen, and decided that I couldn’t just throw some squares together.   I then thought, triangles!  I had never done triangles, well besides half squares, but I wanted to try 60 degree triangles!  After cutting what seemed like a billon of them, I sprawled out in my loft and began to work out a pattern.

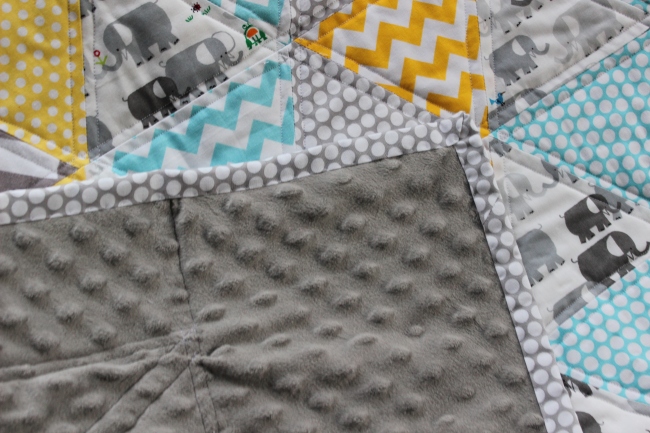
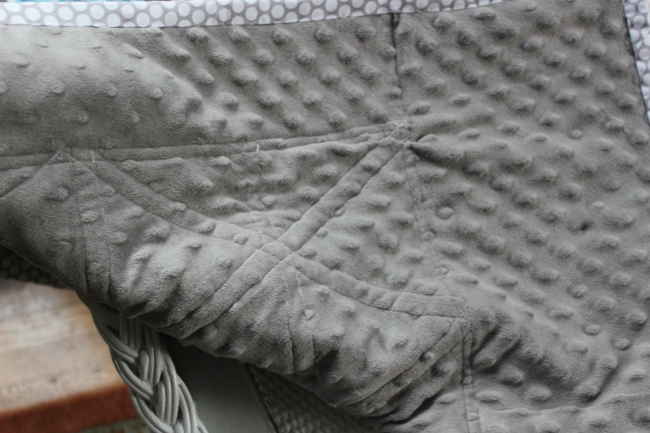
It did take some time, but I pinned a lot and worked my magic!  I quilted all sides of the triangles, which made a really cool design on the back.  The minky was really easy to work with, I pinned the hell out of it.  No shifting issues and it looked better than I thought it would!

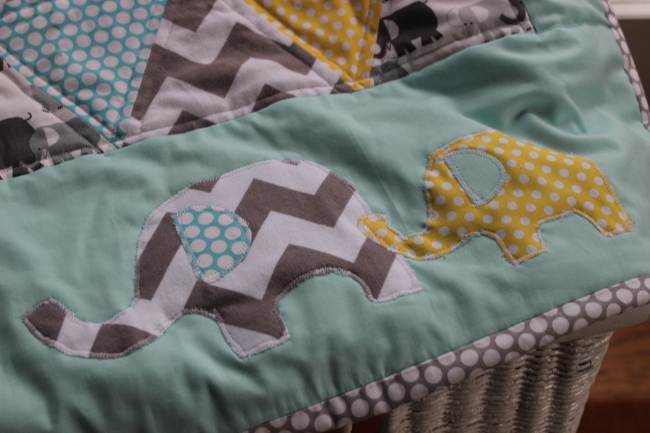
I found some elephant templates on google images, used some fusible interfacing and made the mama and baby elephant for the bottom, stitching a zig zag stitch to secure them.

ImageImage

ImageImage

I really loved working with the triangles!  It’s a great way to incorporate several fabrics!

Ho ho holy moly it’s December!

it’s the season to get crafty people! What are you making?!

How cute is this bag! Would be fun to make for Christmas gifts for those crafty people in your life!

http://www.abbeylanequilts.blogspot.com/?m=1

I have started to find some time to sew again! It’s still hard don’t get me wrong! But I sneak it in here and there.

As I’m spending hours on the couch nursing my daughter I dream of all the delicious fabric and bright threads that are calling my name up in my craftorium!

I started working on my first red work piece, a darling trio of snowmen. I’ve gotten two of the three musketeers complete, hoping to give them away for a Christmas gift…if I can finish them!

In the time I do have to “fun sew”, meaning things I don’t have to do, like fixing uniforms or making and repairing things for others, I’ve decided I need to work on the huge bin of things that are half done. So many misfits in my bin of have completed things! Like most crafters, I have a horrible addiction to fabric. I have way to much, but it doesn’t ever stop me from getting more! Now that we have a baby, I know that I have plenty of fabric to get me through doomsday. I must resist!
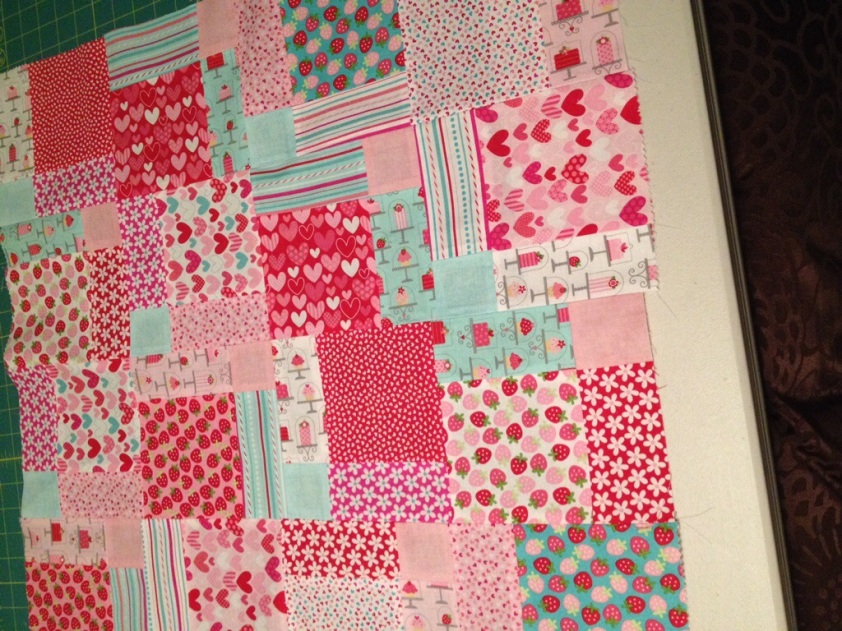
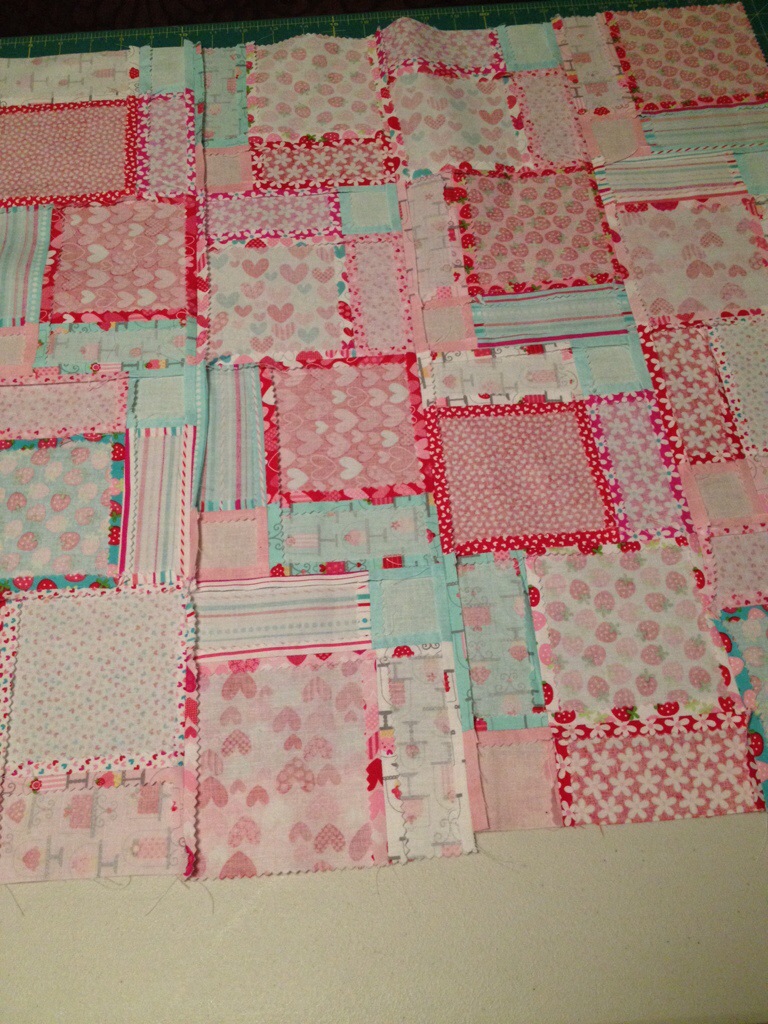
When I was pregnant I got on the charm pack disappearing nines quilt kick. I prepped and got all of my nine charm squares sewn, and that’s where it stopped. I have a problem over buying fabric with dreams of making this or that, but then time and life get in the way, and then that fabric dream fizzles rather fast! The other half of this is what do I do with this amazing hand crafted piece of art when I’m done?! Sell it? Gift it? Well this charm pack quilt will be finished, soon! I haven’t decided what to do with it, but I have decided it needs to be finished! Parting with it will come later!
The darling fabric line dig out of my stash is Riley Blake’s Sweetcakes charm pack. I ordered them from fabric.com awhile back. It’s so darn cute! Bright colors and tiny cakes & hearts! The top is complete, I will post photos soon!

20131203-110638.jpg

20131203-110651.jpg

Little Miss Charlotte’s Nursery is complete!

So this is a way past due post, I know!  A lot of work, love and time has been spent in the design of the room, but we loved the way that it came out!  Miss C is sleeping next to me as I write this!  I remember sitting in her room before she came and just day dreaming about holding her and rocking her in her room, watching her sleep, and changing all of those diapers!  Now that she is here, it’s such an amazing feeling to have her in this space!  It is such a calming place, very whimsical, and it is very organized and functional.

We wanted to create a space that she could grow into, something that wasn’t too childish but fun and interesting for a little one.  I wanted the room to be girly but not in your face girly, modern but classy.  Before we found out that we were having a little girl, I fell in love with a line of fabric, surprise haha!  I have a total fabric addiction, so I wasn’t too shocked, but I hadn’t bought any of it because I didn’t know what I would make with it.  Another shock, because I usually buy fabric that I love in hopes that I will find something to make with it.  I wrote the line down, in hopes that one day I would find something to use it for.  Well, I googled “Mermaid Nursery” in hopes of finding some inspiration.  Everything that I found was all Disney’s The Little Mermaid.  Blah, too expected and not whimsical like I hoped.  I was going through my crafty journal and found it, my saved fabric list!    Sarah Jane Studios designed Out To Sea for Michael Miller Fabrics, and it was everything that I was looking for!  I usually purchase all of my fabrics at fabric.com, I love their selection and prices, and shipping!  I selected a mix of the Deep Sea Jewel and Morning Coral from the collection, as well as a few other prints from Michael Miller to give it a good mix.

Now, some people may think that choosing a fabric line to design the room may be crazy, but I can tell you that it made it so easy for me!  I had a list of which colors and prints in the line that I loved, and from there I chose the paint color for the walls.  After painting some samples on the wall, we chose Kelly Moore Pool Party KM5046-1 for the main wall colors.  I ended up purchasing a few sample colors, which we used to paint some of the other elements in the room.  

editIMG_6814

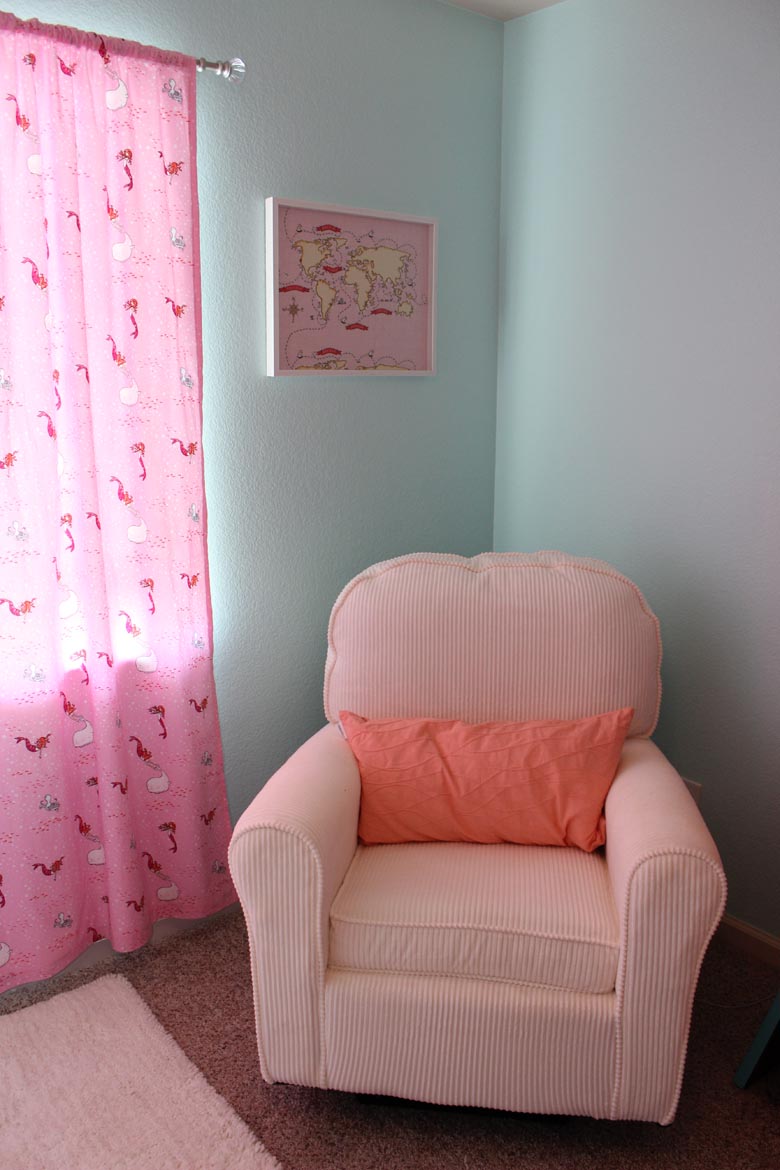
I love the color on the walls!  It is so relaxing and inviting!  Soothing and calming, I have a hard time not getting sleepy in this room!  Dad painted two coats on the wall, and we love it.  Up there on the wall is a shadow box with a fabric pirate map inside that I previously posted about here.   The curtain panels I made using the coordinating fabric, and it gives the room a good pop of pink.  The  comfy glider was from Babies R Us, and the long coral down pillow is Calvin Klein from Home Goods.

editIMG_6798

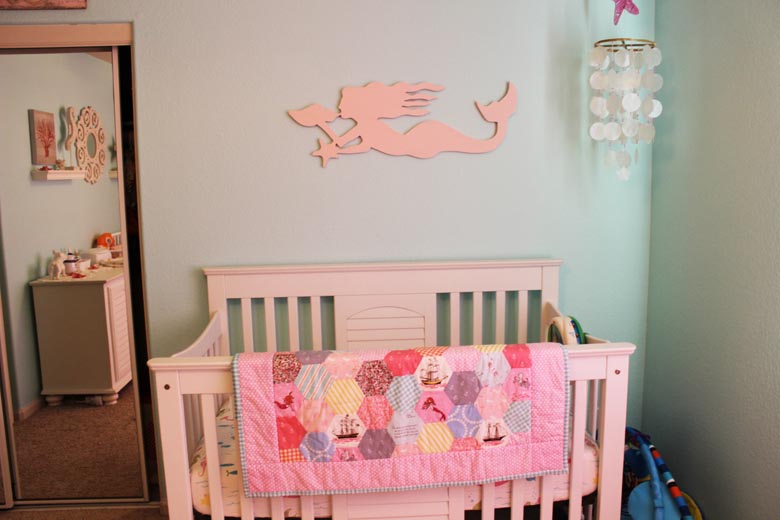
On the left side of the window, is our lovely second had crib with toddler conversion that I bought from my best friend that was used by her girls.  I decided to make her bedding, of course I couldn’t just buy something!  I know that she won’t be using it for quite some time, but I had a vision, and I couldn’t be more happy with how it turned out!  I will be doing another post about the quilt in more detail soon!  It is a standard crib size, and I machine quilted large hexies in several different prints.  I was going to make some sheets as well, but found a darling under the sea print from Pottery Barn Kids that I fell in love with, plus who wants to deal with all of that elastic!  The wind chime was a last minute find also at PBK, it has mother of pearl like disks and a beaded pink starfish, when the breeze comes in it has such a soothing sound!  Above the crib is a wooden mermaid that grandma had found one day while cruising Home Goods.  originally, it was a bright barn red.  I had dad paint it with the left over paint sample that we had, and I couldn’t be more happy with that!  We used Kelly Moore Pretty Please KM5446-1.

editIMG_6799


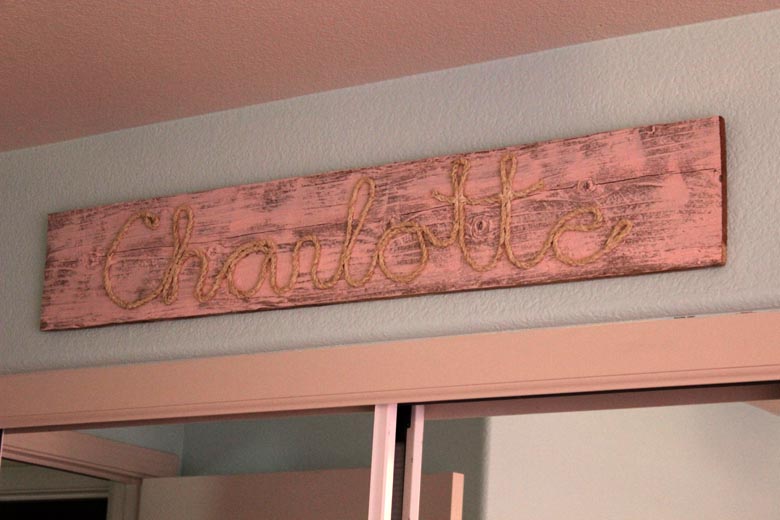
This sign has a lot of meaning to me!  My husband surprised me and made this sign and it was presented to me at my baby shower!  My best bud had been in touch with him, and he designed and made it!  So impressed!  We used an old piece of fence boarding, white washed painted it with the Pretty Please pink paint.  He mixed baking soda and Elmer’s glue to make a paste, and he coated the rope, then used tiny sewing pins to nail it into place on the board.  It dried stiff, and has such a great look in the room!

editIMG_6803 editIMG_6800editIMG_6809editIMG_6805 editIMG_6804


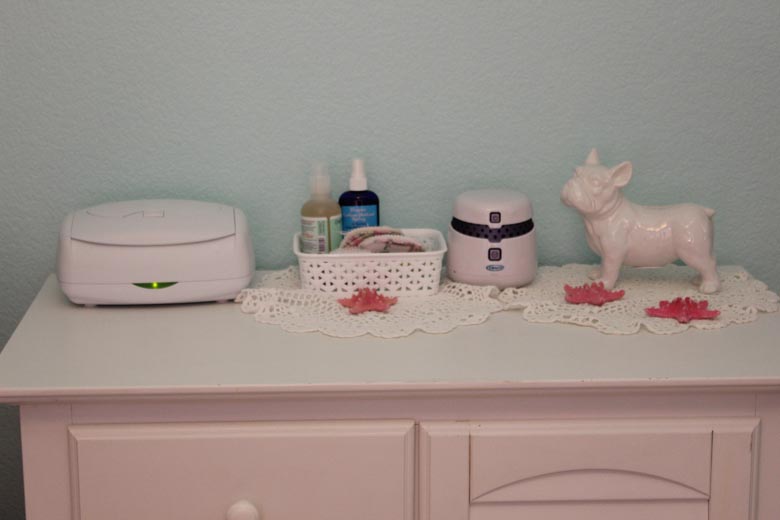
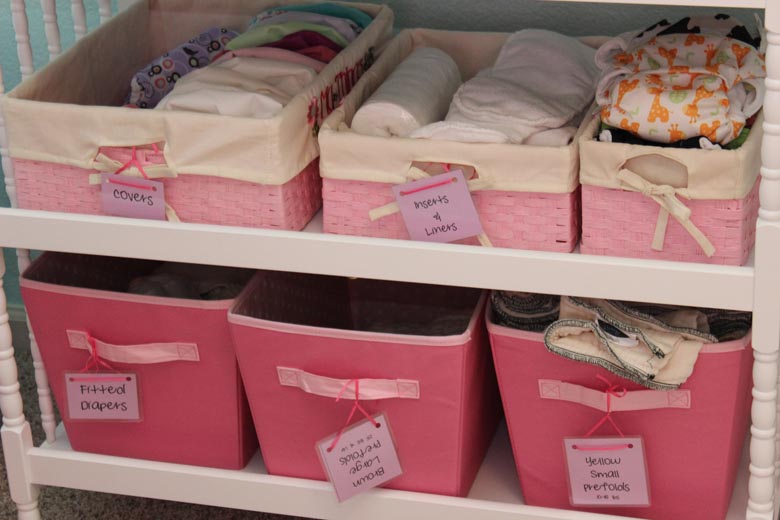
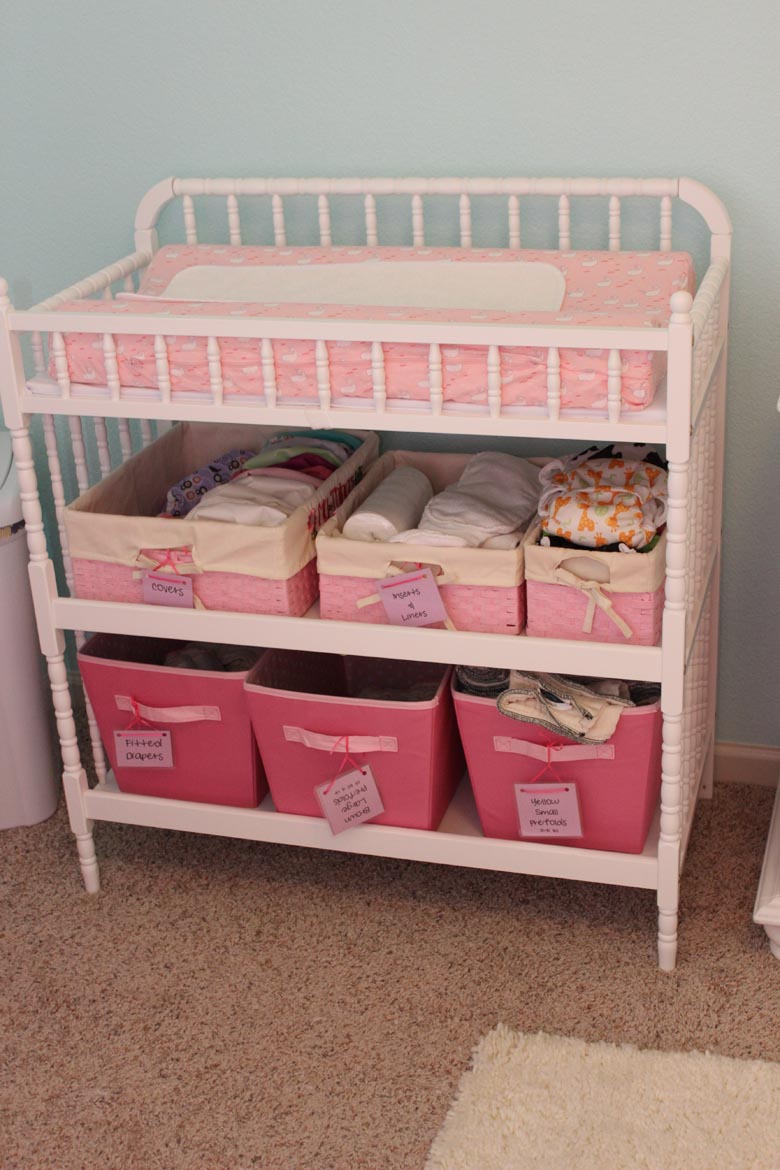
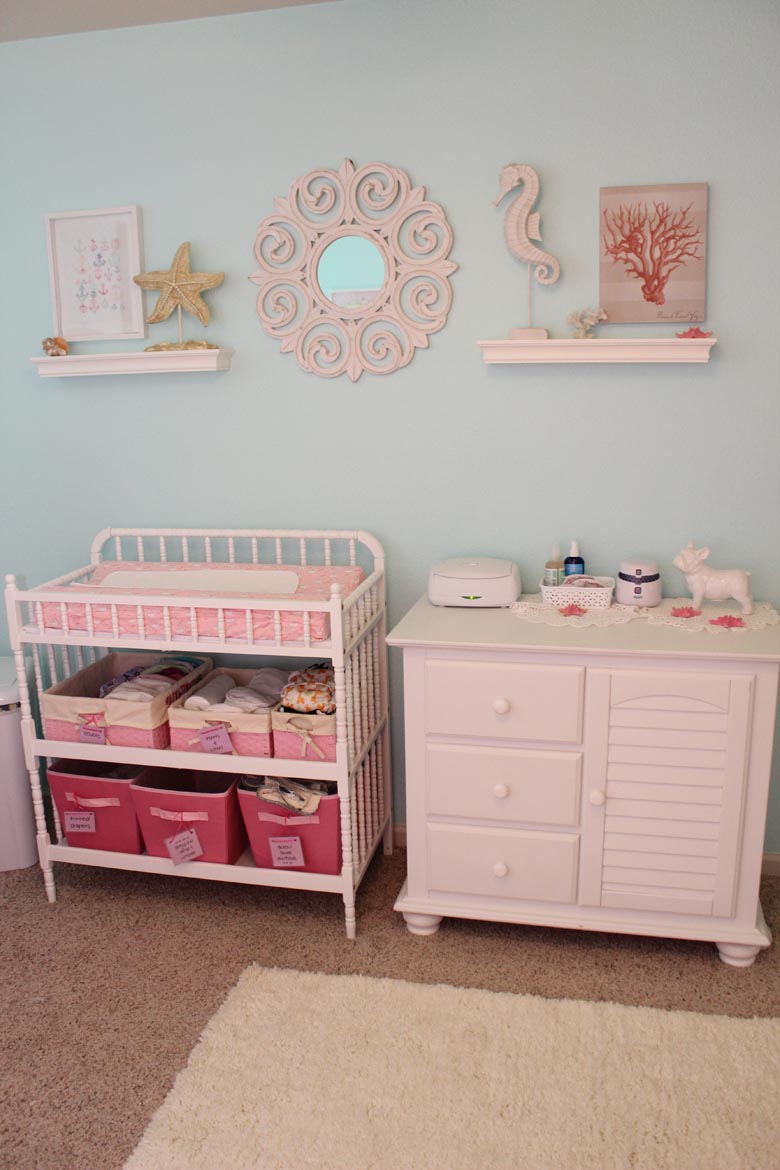
On the other side of the room, we have our changing stations.  The closed one on the right was a matching piece to the crib, and originally we were just going to use that one and a dresser.  However once we decided to cloth diaper, I quickly realized that we were going to need another area to store and easily access her diapers.  Plus, if we just had the changing pad on top of the closed dresser, where was I going to put all of the other things like wipes and creams?! So this was a perfect solution for us!  I purchased the one on the left at Walmart, it was right around $80 shipped to the house.  I made the changing pad cover, it took forever!  So I just made that one!  I have others of course, but the contouring of the pad made it a little tricky to sew!  It’s really cute, I used the Narwhal print!  All of the baskets on the first shelf are from Home Goods, and the bottom ones I got on clearance at Target.  The baskets on top have all of our covers and inserts.  The bottom bins hold all of the pre-folds and fitted diapers.  I purchased a cheap pop top garbage can from Walmart for our diaper bin.  We love our wipes warmer and white noise machine!  We can plug an iPod into it, and it has a soft blue night-light which helps for late night diaper changes.

editIMG_6808 editIMG_6807

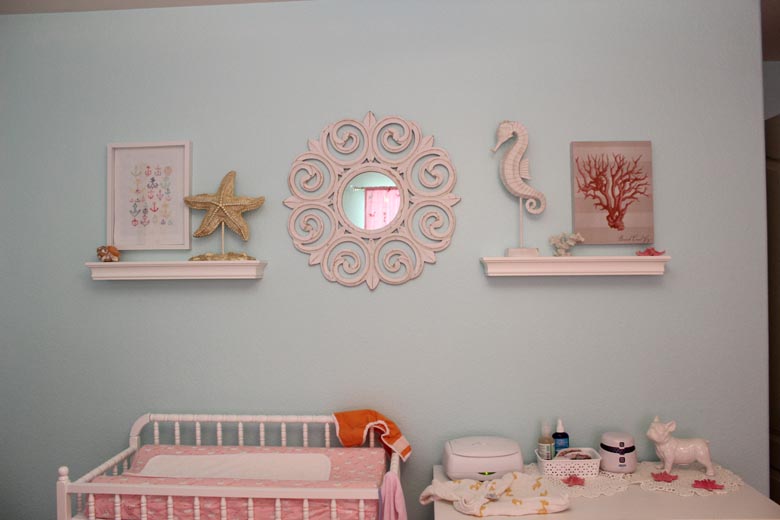
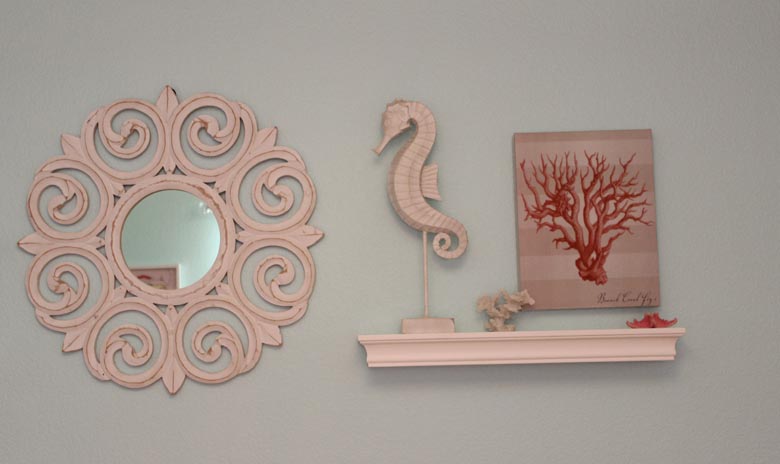
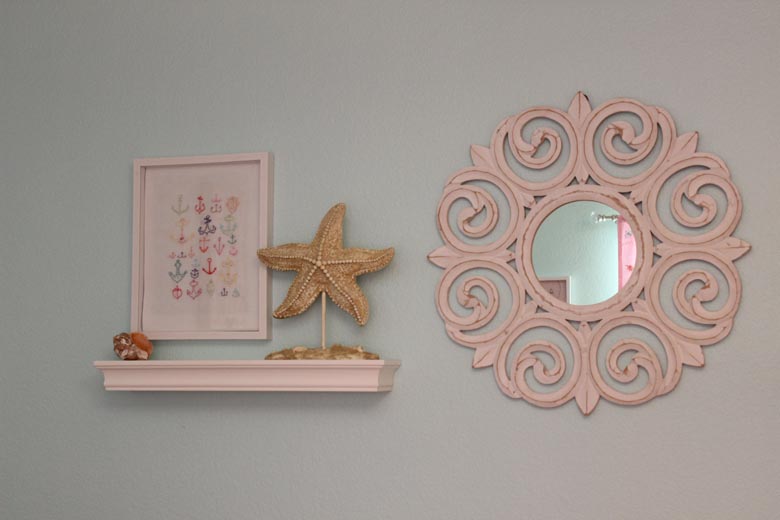
Now, at first I was worried that I wasn’t going to find decor that fit my vision.  I didn’t want cheesy, typical beach things, and I wanted it to be classy but not typical.    The circular swirl mirror was the first find, setting the inspiration for the whole wall.  And for a steal at $26 at Home Goods, it was a perfect match!  Floating shelves were a stream lined way of having just enough decor without it looking cluttered, plus all of the amazing Home Goods finds that I found I had to put somewhere!  I didn’t want to clutter up the top of the changing table, so for $12 each it was a great solution!  Plus they are up high enough to keep little curious hands away!


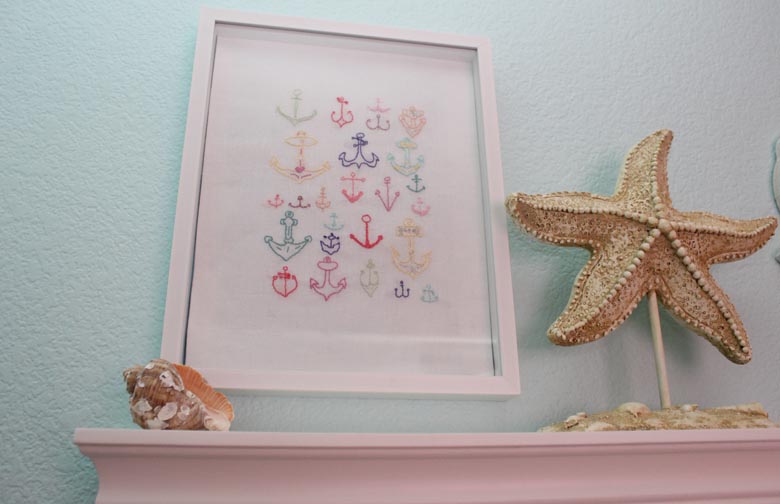
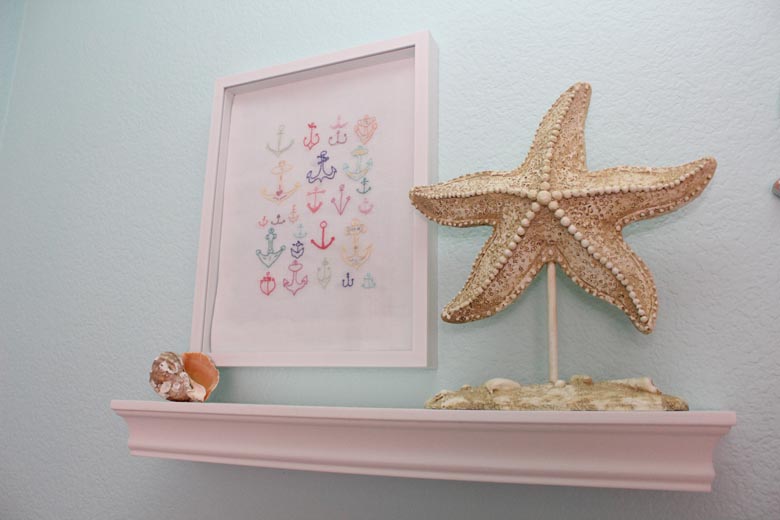
On the far left shelf, I hand embroidered some colorful anchors.  I just did an image search for anchors & coloring pages, and I found a group of several different types of anchors.  Hung it up in a shadow box for a cute hand-made piece of decor.

EditIMG_6825 editIMG_6824

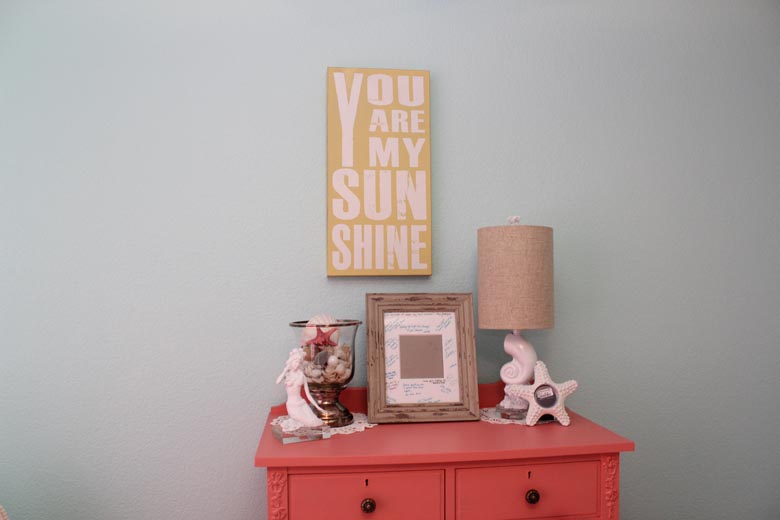
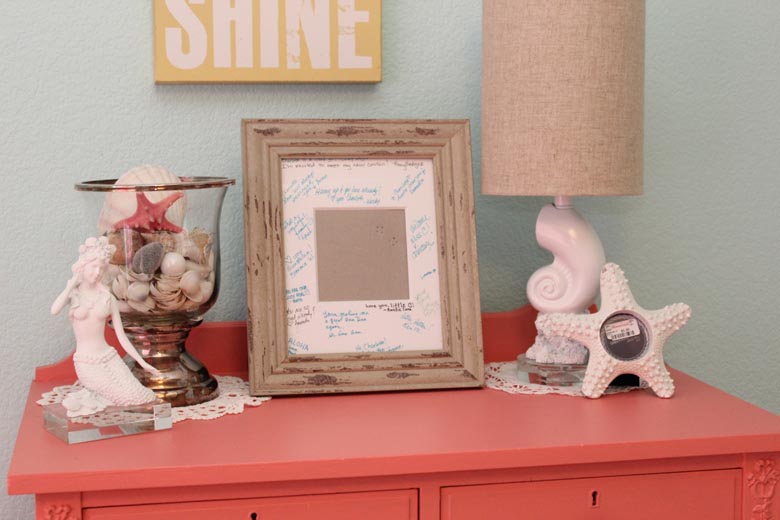
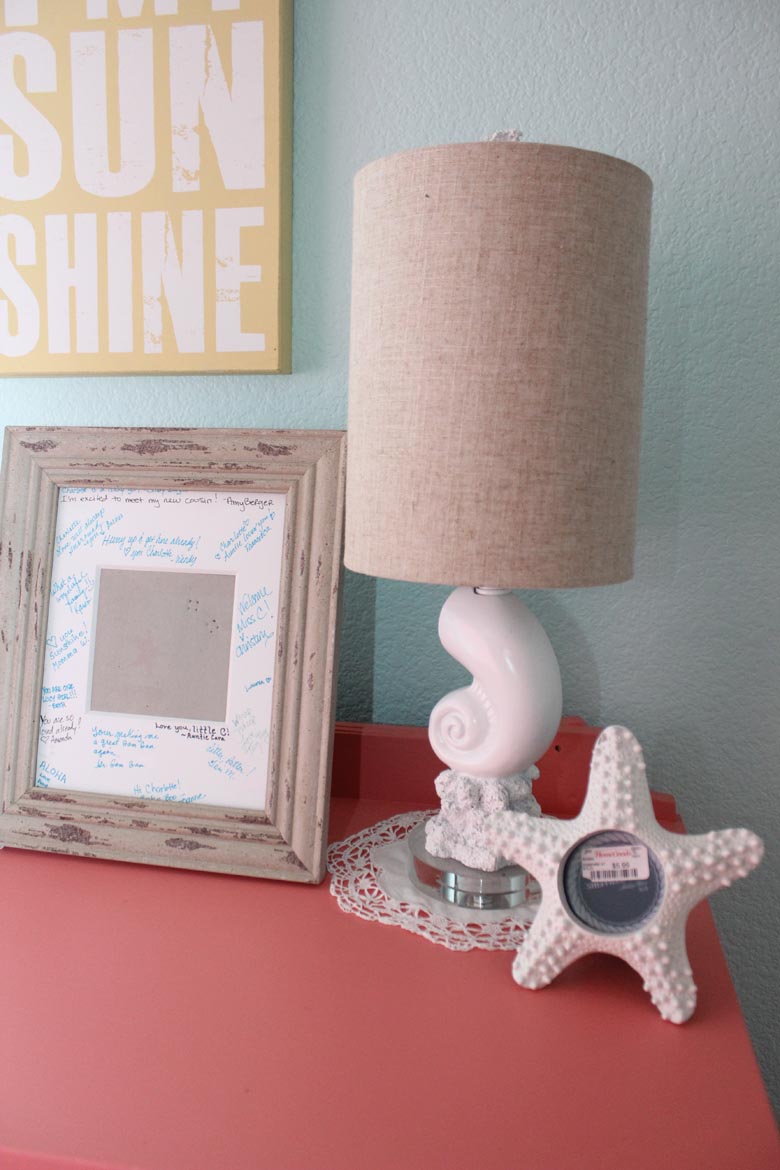
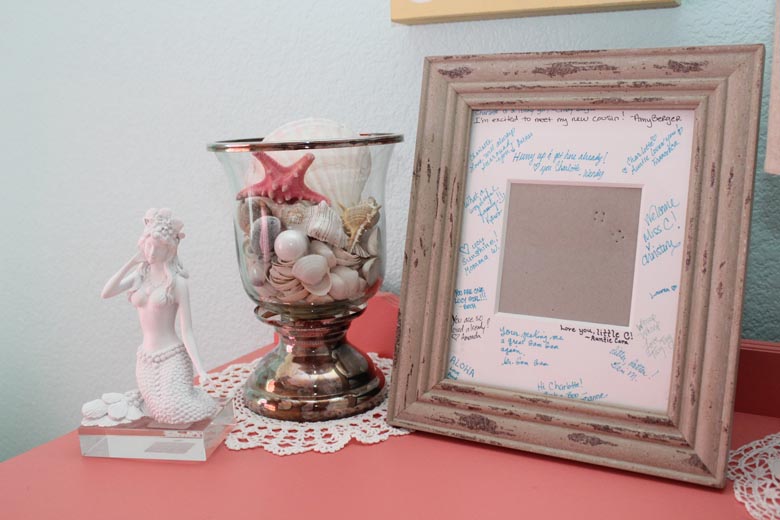
On the last wall, we kinda struggled with what to do, as  I had some more art work and hand embroidered items, like the Narwhal  piece that I made.  We struggled with where to put it all, then finally decided that just because I made it wasn’t worth cluttering up the entire room.  So, we kept it simple.  The wall hanging was another, you guessed it, Home Goods find that I picked up during Easter time.  The hurricane vase with a etched “V” was a gift from Pottery Barn, filled with shells.  The lamp, mermaid and star fish frame were all from Home Goods.  During my shower, guests signed the frame for little Miss C!  They both need photos, now that I have a bunch I need to get on that!
 

editIMG_6812 editIMG_6810


editIMG_6823 editIMG_6822

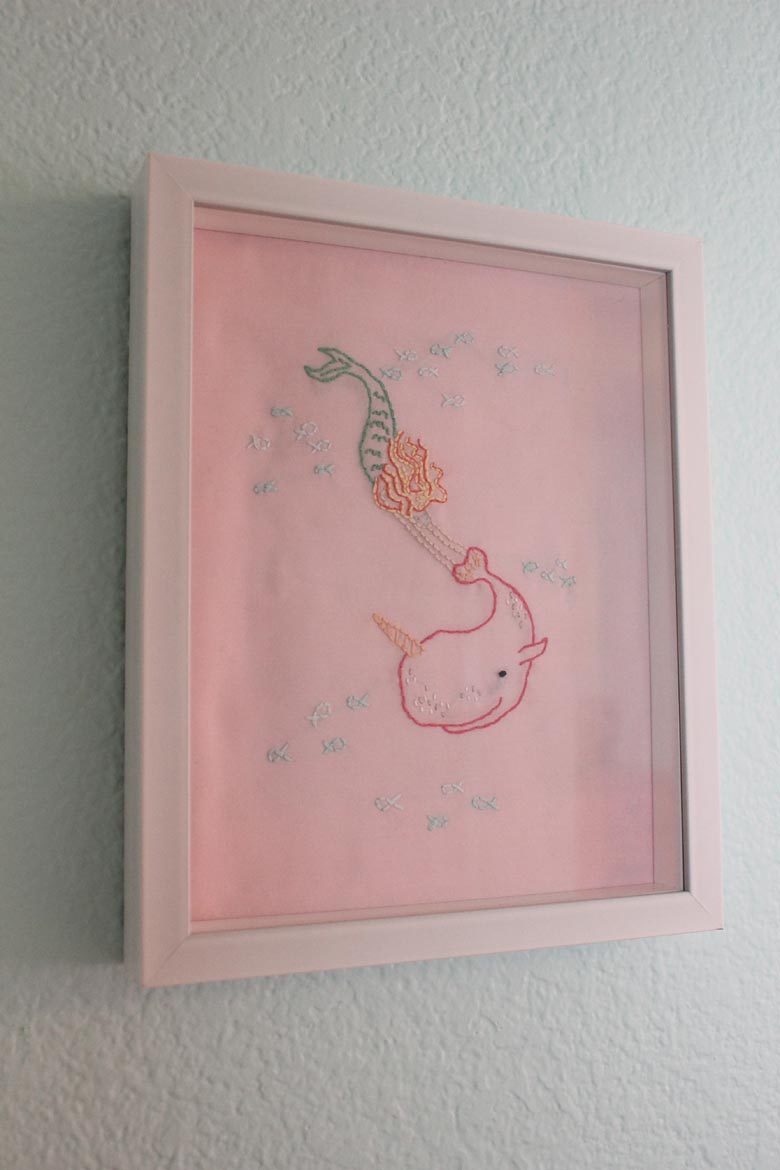
Lastly, here is another embroidered piece that I worked on for this space.  My original idea was to make it into a pillow, but it fit perfectly into one of the shadow boxes that I picked up when they were on sale at Joann’s.
I downloaded the pattern from Sarah Jane’s Blog, there are a few other ideas over on her blog, check it out!  

editIMG_6821


This space is one that I have dreamed about making for so many years, and I am in love with the way it turned out!  There is nothing in there that I would change!  It is such a lovely space, it is organized and charming!


Little Miss Charlotte!!

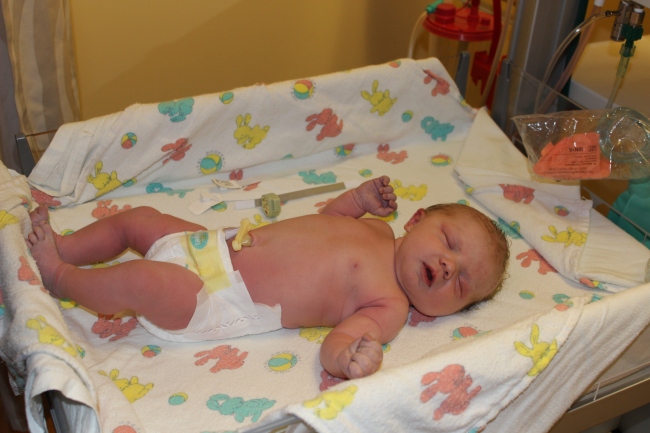
Well, I am so happy to say that our little girl has finally made her arrival!  She made her debut after 40 weeks and 6 days, 21 hours of labor, and lots of patience and love!  Everything that I went through during my pregnancy, weeks of morning sickness, the hot summer here, and being diagnosed with SPD (Symphysis Pubis Dysfunction), was all worth it!

We went in on August 27th for a regular appointment.  We had figured that we would be induced in a few days if she hadn’t decided to come out on her own, but my doctor told us that we could come in later in the evening that day for induction.  So, we left the hospital, went and had a nice lunch, and went home to rest for a few hours.  Around 4pm that afternoon, contractions started on their own.  We got to the hospital around 7pm, and my contractions were 1 minute long and about 5 mins apart!  I was hopeful that we wouldn’t need Pitocin, and I could just labor on my own.

The nursing staff and midwives were amazing!  Besides being poked 9 times for my IV due to being a hard stick anyways and being super puffed like the marshmallow man, I got my IV and just had some fluids going.  By around 9pm I was at 5 cm and 80% effaced, contractions were now 90 seconds long and about 1 minute apart!  Holy cow, it was super intense!  I labored with contractions this close apart, for about 3 hours.  She was sunny side up, so with the contractions as close as they were for as long as they were, with the back labor, it was intense!  Not to mention the increased pain from the SPD, I gave in around 1130, and asked to get the epidural.  It was the best decision ever!  I was able to take a break, I was exhausted from the intense pain and progression.

My labor continued to progress quite well, I was at 7cm at 230am, and 90% thinned out.  Dad was able to take a much needed rest, ever time that I moved or made any noises he would shout, “are you ok?!” .  “Yes babe, I’m just eating ice chips!” or “I’m just moving!  Relax!!”.  Clearly he was just concerned!  I am sure he needed me to get that epidural too, it was a lot of work for him to support me, and watch me go through all that!

I was fully dilated at 0700am, fully thinned out, but she wasn’t turning or dropping.  We started to push at 1100am, and our beauty was born at 1223pm on August 28th!

Image

Charlotte Marie, 8 pounds 9.7 ounces, 21 inches long

We fell in love the second we saw her!  It was the most amazing experience we both have ever had!  Exhausting, but worth every second of lost sleep!  We came home after two days in the hospital, had a stead stream of family coming to visit her!  We feel so blessed to welcome her into our family!

Thank you all for your support!  I will be trying my best to keep blogging, and crafting!  It has been a challenge but I really love blogging about all the wonderful things that I create, and I will continue to do so, hopefully I will be able to do more of it as soon as things settle out a bit!

Quick and easy drawer liners

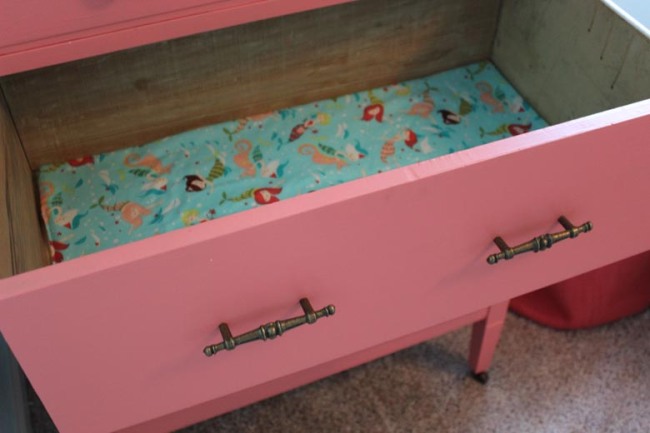
The nursery is coming along!  One piece that is in the room is a vintage tall boy dresser.  Hubby painted it Lively Coral from Kelly Moore paints, and I couldn’t be more happy with it!  It looks amazing against the blue walls!  Final pics to come as soon as its completed, but we did come across one issue, the inside of the drawers.  Because they are old, the wood is a tad rough, and I didn’t want any of Miss Charlotte’s darling clothes to get snagged!

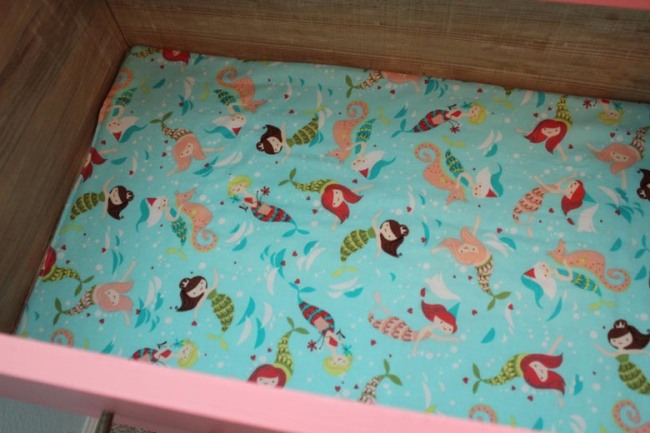
We cleaned out the drawers really well, but I didn’t want them painted.  So today I whipped up a few fabric drawer liners!  Such a fun and colorful way to line your drawers with out plastic and paper, and you could use any left over or extra fabric scraps that you have.

I picked up this super cute teal mermaid fabric to go with the theme on sale at Joann’s the other day.  Measure your drawer and add a 1/4″ for seam allowance.  Cut two pieces of fabric and a piece of low loft batting.  Place the batting on the bottom, then your first piece of fabric, print side up, then the other piece print side facing the first.  Stitch with a 1/4″ seam allowance and leave an opening to turn your liner.

Turn, press, and top stitch, and there ya go!  Darling and easy drawer liners!!

ImageImage

Narwhal embroidery

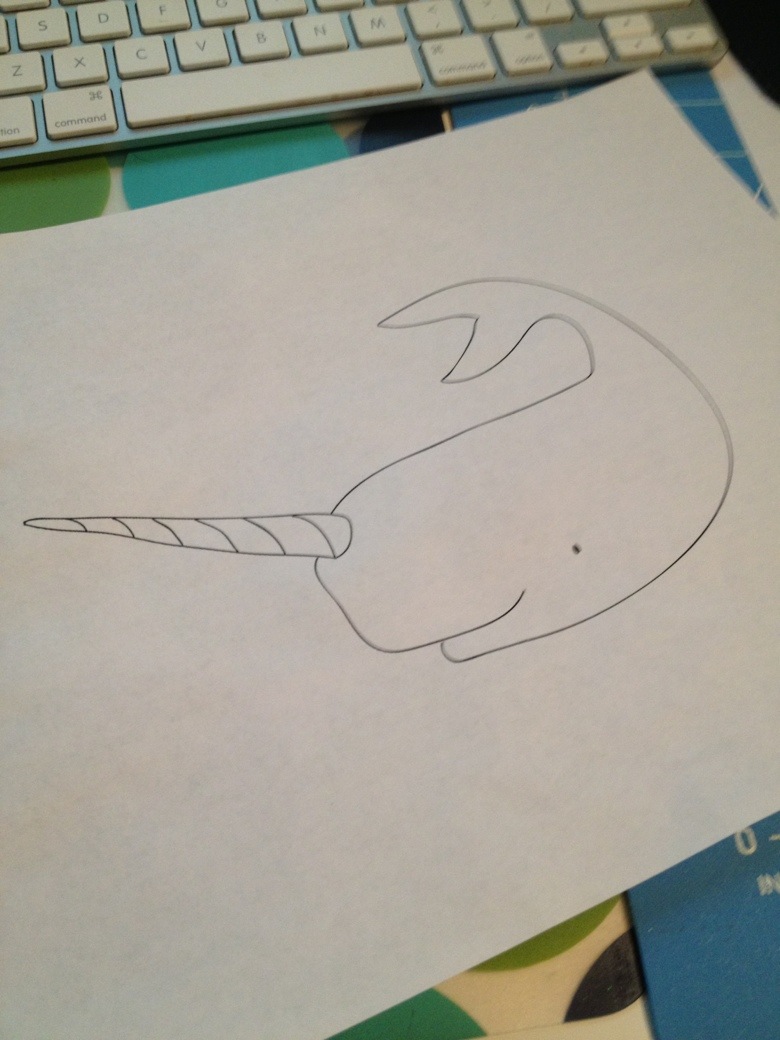
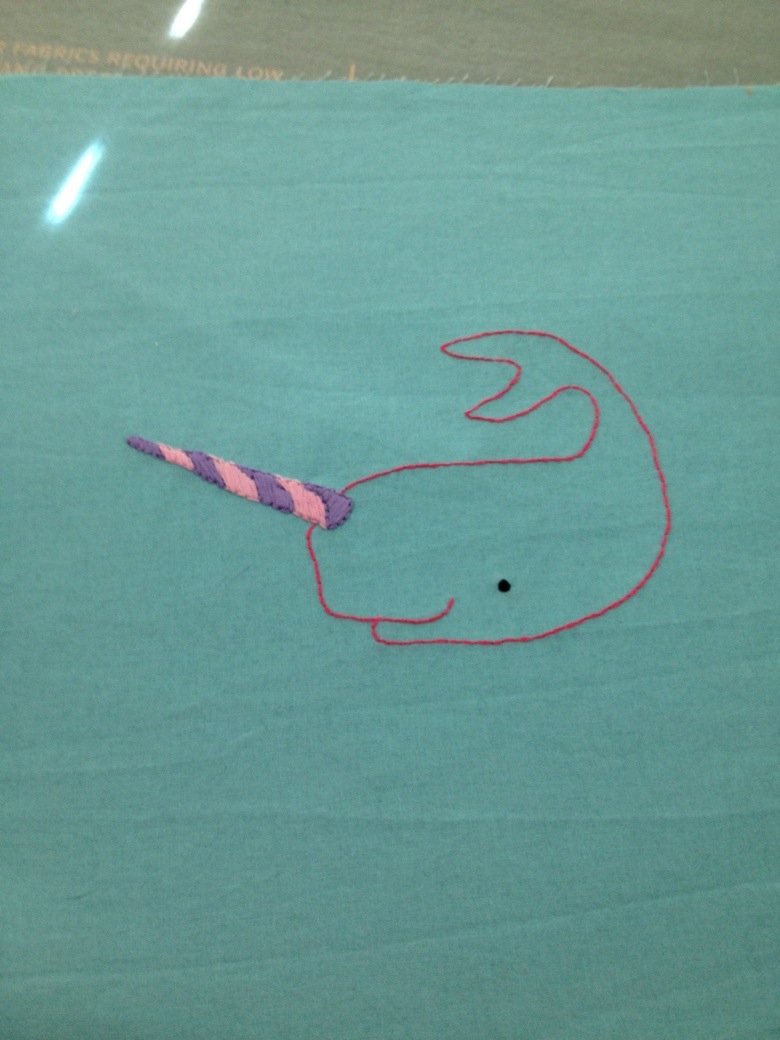
Narwhals and mermaids just are a great pair! Here’s some embroidery that I’ve done for a pillow for Charlotte’s rocker in her nursery.   You can find the inspiration here, I chose to use the template to embroider Mr. Narwhal instead of the applique.  Finished project coming soon!

20130403-210802.jpg

20130403-210823.jpg

Shadow Box Pirate Map

Image

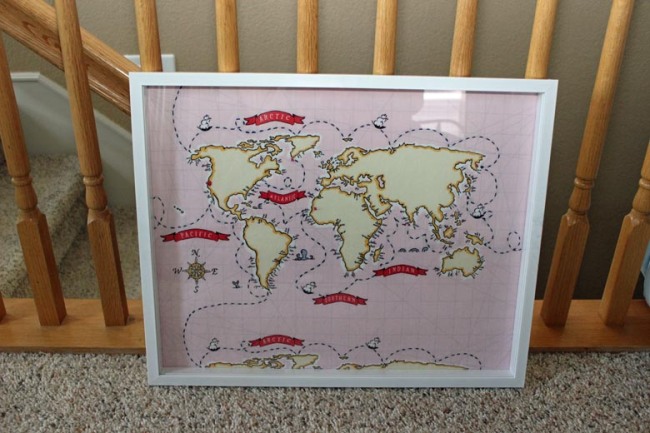
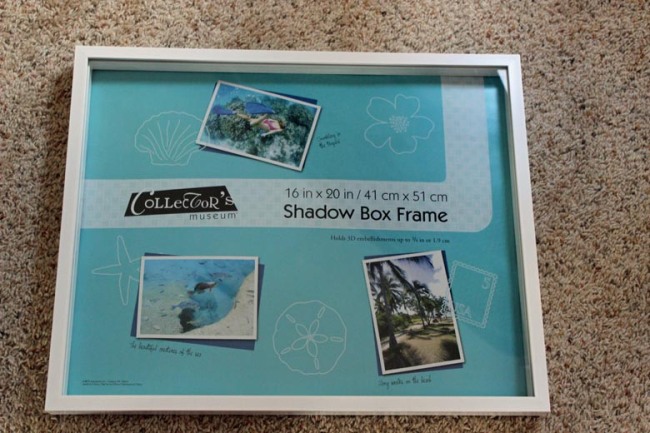
Isn’t this fabric sooo stinking cute!!!  I order Sarah Jane Out to Sea , and when I saw it in person I fell more in love!  The first thing that I thought when I saw this super cute soft coral pink map, frame it!!  A lot of people are putting fabric into embroidery hoops right now for nurseries and I wanted to do something a little different!  I got this large, shallow shadow box from Joanns half off, I think that I paid 12$ for it.  I grabbed some smaller ones as well that I will share with you!

Here’s what you will need:

Shadow Box

Fabric/embroidered piece

Fusible batting

Embroidery floss, hoop & needle

Iron

Fabric glue

Image

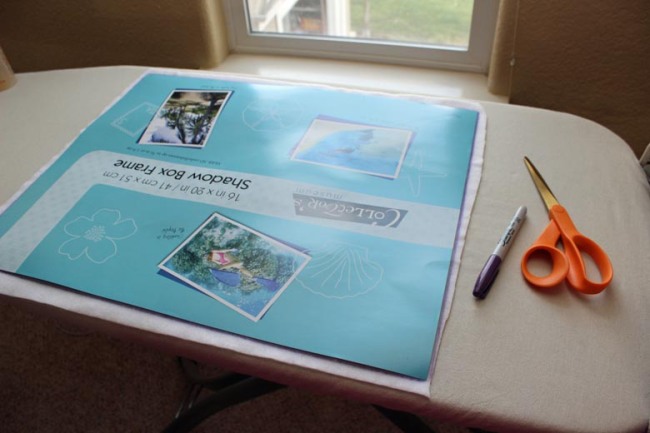
Open up the shadow box and take out the insert there, you will need that as a template and will be attaching your project onto it.

Image

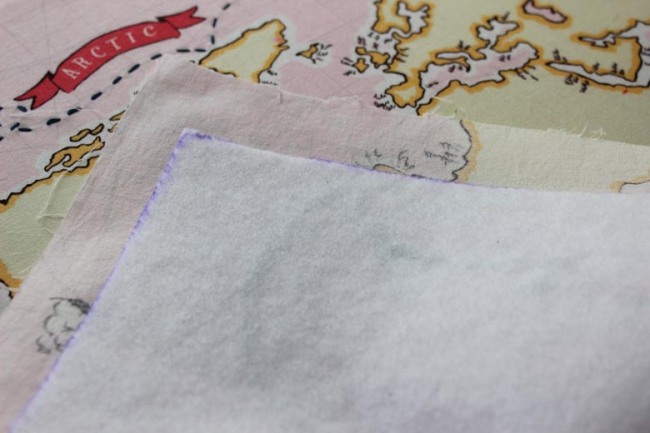
Trace the size of the shadow box with a sharpie onto the fusible batting and cut on the inside of the line, you want to make it just a smidgen smaller so you don’t have any puckering when you place your piece inside.

Image

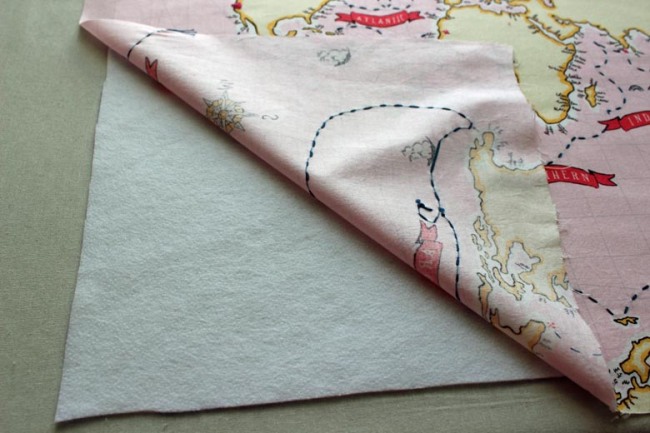
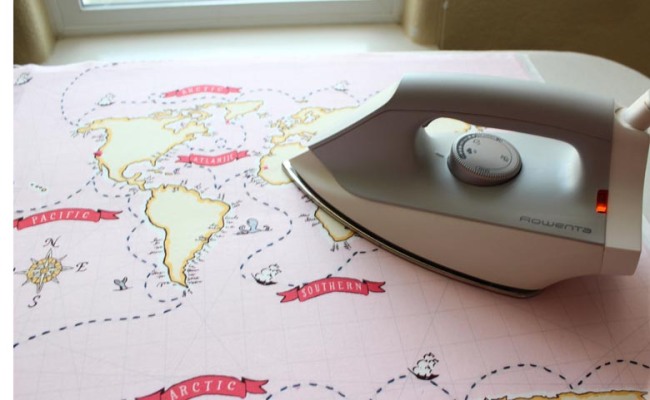
Flatten and smooth out your fabric on top of the fusible batting, fusible side up.  Press with an iron to set into place, attaching your fabric to the batting.

Image

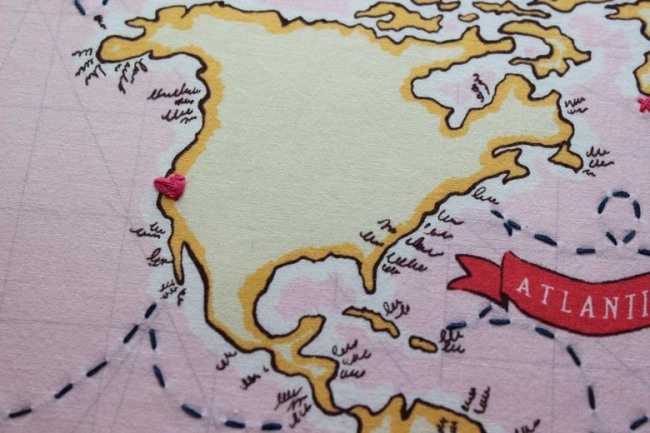
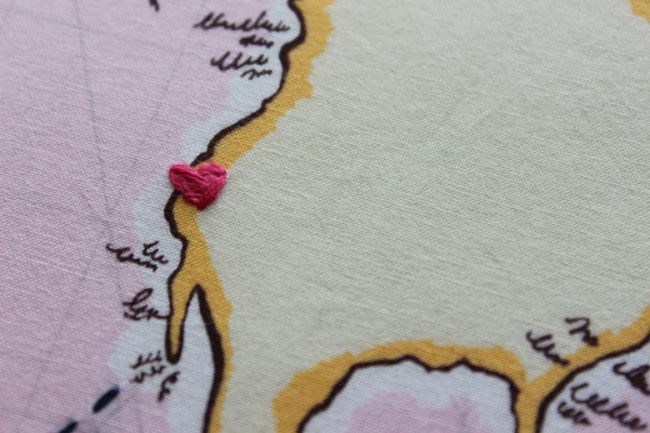
This fabric is darling as it is, but I wanted to do a little something to it.  I took a navy embroidery floss ( I always use DMC) and stitched over the print in certain areas.  I went over all the hashed treasure map lines, the “X marks the spot” x’s and I made a little heart over California for Charlotte’s home!

ImageImage

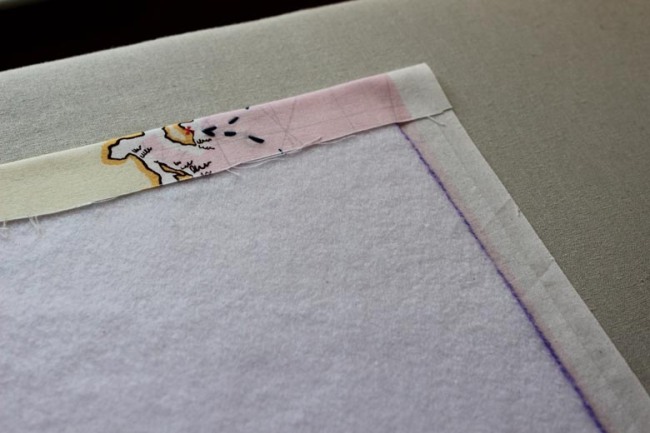
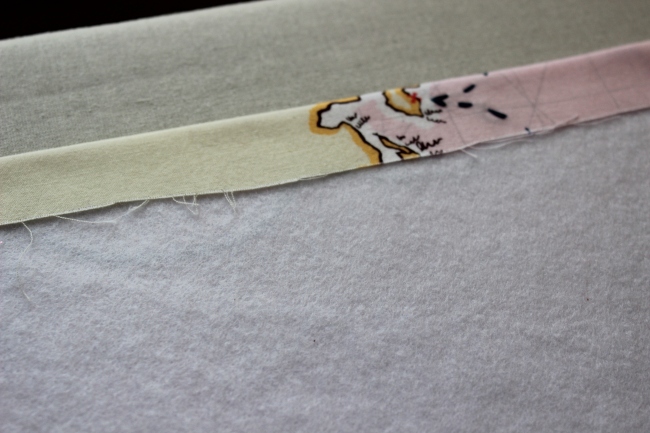
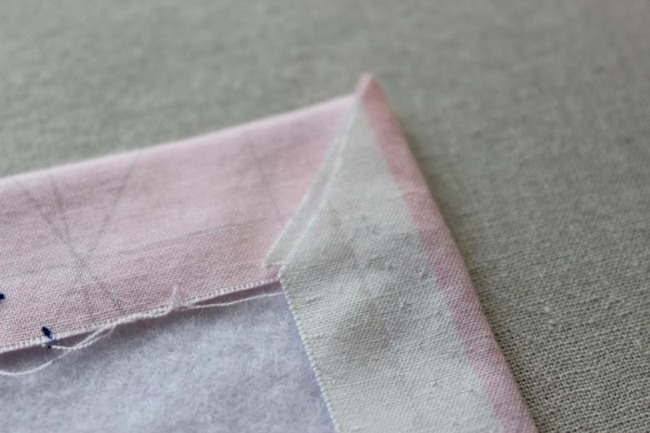
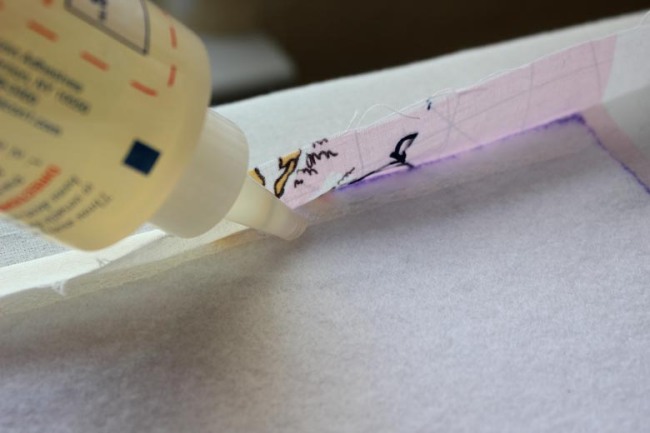
Grab your fabric glue and trim your fabric to about an inch border around the batting.  Fold over and glue as you go, trimming the edges.  Trimming off excess bulk will help you when you are trying to jam it in the shadow box!

Image

ImageImageImageImage

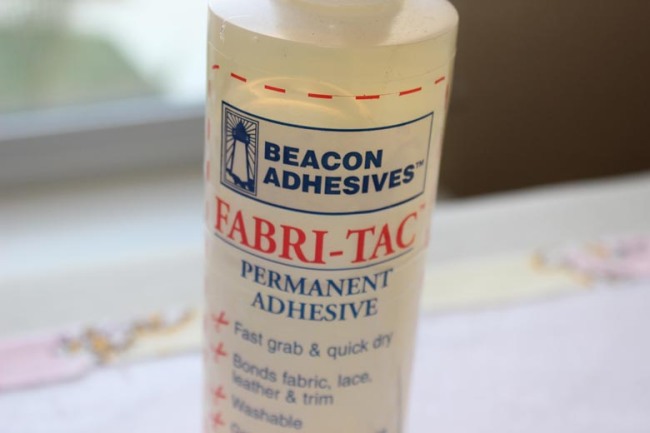
I love this glue for fabric!

Image

Image

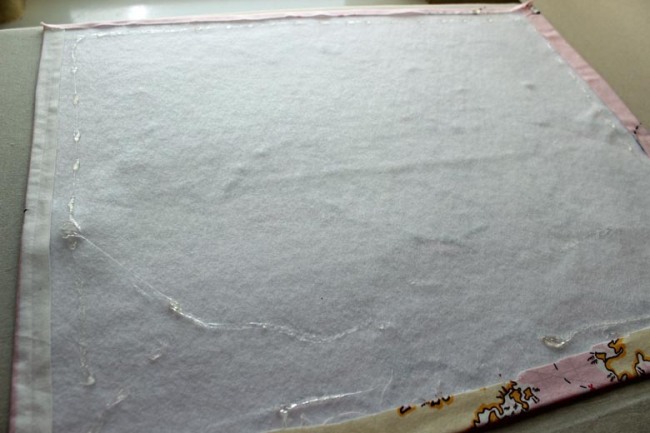
Next, place a little bit of glue around the back and place the same cardboard insert piece on top, this gives it a little more stability.  Once you sandwich those together, you can insert into your frame!

Nursery madness begins!

Hey y’all!!  So we decided on Charlotte’s nursery theme!  A mermaid/nautical with bright fun girly colors!  And of course there will be LOTS of getting hot chocolate wasted crafty!  We can’t begin to tell you how excited we all are to welcome this lil one, and we are having fun putting this special space together for her!

So, I started off by picking the textiles, which I think that this is the only way to start such a large project.  I found this adorable, whimsical fabric by  Sarah Jane for Michael Miller.  I bought almost every piece in the line from fabric.com.  I love ordering from fabric.com!  Always great prices and free shipping over $35!  I ordered a little bit of each one, plus some others.

We bought the crib and changing from a dear friend which belonged to her daughter and was in great shape. I also bought this changing table for all of my cloth diaper stash.   An old dresser that belonged to my great grandmother is getting an uplift from Dad.  We are still trying to decide on a rocker.

For wall color, we chose Kelly Moore Pool Party, its a beautiful soft cool blue. The dresser is also Kelly Moore in Lively Coral.

I will keep y’all posted on where this fun project goes!!!